artisan bread with soft wheat -- it can be done!
A few weeks ago, I posted a question about using soft winter wheat for baking artisan bread. Here's the brief story. My wife and I are somewhat passionate about local food. Since we can only grow soft wheat here in Kentucky, I always assumed that I would have to buy flour milled from wheat grown in Kansas or the Northern Plains.
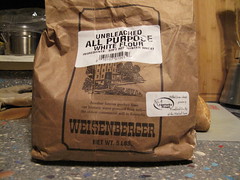
Fast forward to Monday when I was at the market and saw this:
- Log in or register to post comments
- 2 comments
- View post
- ericb's Blog


