The Fresh Loaf

A Community of Amateur Bakers and Artisan Bread Enthusiasts.

Blogs

HeiHei29er's picture
HeiHei29er

I have been working on a new starter, and you can find details on that in my forum post.  Yesterday's bake was the second bake using it, and so far so good!

Vermont Sourdough with a Cracked Rye Soaker

The first bake was two loaves of Vermont Sourdough with a cracked rye soaker added to it.  The only variation is the levain.  I did not use an overnight levain build per Hamelman's method.  Instead, I used the same amount of prefermented flour but out of a starter refresh at 140% hydration.  Loaves turned out great!  Completed bulk in 4 hours (50-75% rise at 76 deg F) and final proof in 1 hour.  No crumb shot for these as they were both spoken for by friends.


Maple Spelt and Barley

This loaf was an experiment.  I picked up a 10" round banneton and haven't made a loaf with it yet.  This loaf was a porridge bread that used farro, hulled barley, maple sugar, and whole milk for the porridge.  The loaf also had spelt and barley flours.

The porridge was made by cooking the farro and hulled barley with water only and low heat until fully hydrated and soft (~2 hours).  The fully hydrated grain was pureed in a food processor before returning to the pot where the milk and maple sugar was added.  Cook on low heat and stirring regularly until the porridge is creamy.

Again, I used the new starter at 140% hydration after a 9 hour refresh.  I didn't know where to go with hydration as this used spelt, had a significant amount of low gluten flour with the barley, and had a creamy porridge.  It was on the wet side after final mix.  Thought about adding a little more flour, but I wanted to see if the flour would take it.  It was close, but the loaf spread a little more than I wanted.  This bread proceeded very similar to the VSD.  Bulk was nominally 50-75% rise and was done in just under 4 hours.  Final proof was also an hour for this dough.

The loaf spread more than I wanted, but I attribute that to the moist dough and the spelt.  I couldn't quite get the strength in the dough that I wanted.  However, the crumb was excellent with this bread!  I split it with my neighbor, so I had to cut it a little early (~ 5 hours after baking).  It was still curing, but very happy with it! 

All three of these loaves were baked at the same time using the new baking steel.

Danni3ll3's picture
Danni3ll3

This was an interesting bake as I don’t remember the last time I just used plain white flour to make a loaf of bread. Reason for making this is that my dad is in dialysis and his diet is extremely restricted. Plain white sourdough bread is allowed. So the only bit of whole grain comes from the starter and comes out to only 25g per loaf. The dough felt very different than what I’m used to dealing with. I added an undetermined amount of water when it was in the mixer because it was too stiff so water amount is a guess. 

So it was basically 1200 g strong bakers unbleached flour, 750 g water plus extra, 22 g pink Himalayan salt, and 250 g 100% hydration Levain. The levain has 75 g of whole grain Kamut and 50 g white flour. 

  1. I simply followed my usual procedure using 10 minutes in the mixer and 4 coil folds after that. The dough took a bit longer to ferment than my heart healthy loaves. Baking was the same. 
    Crumb seems to be very creamy and custardy. It might have benefited from baking a bit longer. Then again, it wasn’t completely cooled off when we cut into it. Blame hubby for that. 
Danni3ll3's picture
Danni3ll3


Recipe

Makes 3 loaves


Porridge 

150 g rolled oats

300 g water


Dough

700 g Strong Bakers Unbleached flour

200 g freshly milled whole grain Spelt flour (200 g Spelt berries)

100 g freshly milled whole grain Kamut flour (100 g Kamut berries)

50 g freshly ground flax seeds

25 g black sesame seeds

700 g water + 25 g

22 g salt

30 g yogurt

50 g olive oil 

250 g levain (procedure in recipe)

Extra wholegrain flour of your choice for feeding the levain


The night before:

  1. Mill the grains and place in a tub. Add the unbleached flour to the tub as well. Cover and set aside.
  2. Take 10 g of refrigerated starter and feed it 20 g of water and 20 g of wholegrain flour. Let that rise at cool room temperature for the night. 


Dough Making day:

1. Early in the morning, feed the levain 100 g of filtered water and 50 g of strong baker’s flour and 50 g wholegrain flour. Let rise until doubled (About 5 hours, mine was ready in 4 and a half). 

2. About two hours before the levain is ready, put 700 g of water in a stand mixer’s bowl and add the flours from the tub.  Mix on the lowest speed until all the flour has been hydrated. This takes a couple of minutes. Autolyse for a couple of hours at room temperature. 

3. Make the porridge: Add the water to the rolled oats and cook on medium heat until the liquid is absorbed and porridge is very thick and creamy. 

4. Once the autolyse is done and the levain has doubled, add the salt, the yogurt, the porridge, the oil, and the levain to the bowl. Add the extra water if needed. Mine needed it. Mix on the lowest speed for a minute to integrate everything, then mix on the next speed for 9 minutes. 

5. Remove the dough from the mixing bowl and place in a lightly oiled covered tub. Let rest 45 minutes in a warm spot (oven with light on). 

6. Do 2 sets of coil folds at 45 minute intervals and then 1 more set after 30 minutes. Let rise about 30%.

7. Tip the dough out on a bare counter, sprinkle the top with flour and divide into portions of ~860g. Round out the portions into rounds with a dough scraper and let rest 30 minutes on the counter. 

8. Do a final shape by flipping the rounds over on a lightly floured counter. Gently stretch the dough out into a circle. Pull and fold the third of the dough closest to you over the middle. Pull the right side and fold over the middle and do the same to the left. Fold the top end to the center patting out any cavities. Finally stretch the two top corners and cross over each other in the middle. Roll the bottom of the dough away from you until the seam is underneath the dough. Cup your hands around the dough and pull towards you, doing this on all sides of the dough to round it off. Finally spin the dough to make a nice tight boule.

9. Sprinkle a  mix of rice flour and all purpose flour in the bannetons. Place the dough seam side down in the bannetons. Let rest for a few minutes on the counter and then put to bed in a cold (38F) fridge overnight.


Baking Day

1. The next morning, about 11-12 hours later, heat the oven to 475F with the Dutch ovens inside for 45 minutes to an hour. Turn out the dough seam side up onto a cornmeal sprinkled counter. Place rounds of parchment paper in the bottom of the pots, and carefully but quickly place the dough seam side up inside. 

2. Cover the pots and bake the loaves at 450 F for 25 minutes, remove the lids, and bake for another 20 minutes at 425 F. Internal temperature should be 205 F or more.

albacore's picture
albacore

I was reading how UK bakers, especially in Scotland and Ireland, used to bake their batch loaves in wooden frames. That's right - the wooden frame goes INTO the oven! Originally, the bakers didn't even use a frame - it was just lengths of heavy timber inserted into the oven defining a rectangle with the dough pieces inside the rectangle. Interestingly, these lengths of wood were called "upsets".

There's a Scottish baker, Wild Hearth Bakery, who does these batch loaves to perfection. Some regional German breads are also baked the same way.

The idea was so wacky, I just had to try it! Like all new things baking, the journey turned out to be a lot longer than expected....

So I made a simple frame designed for 2 loaves. Oak for 2 sides and maple for the other 2 - just what I had available. I guessed at a size of 5" tall x 9" x 6 3/4" internal. Simple butt joints screwed together:


I made white yeasted bread based on a 4 hour sponge. Baked for 1 hour at 200C Two main problems: the dough stuck badly to the wood (even though oiled well multiple times) and not enough rise.


I then read that the frames should be oiled and baked empty for 60 mins at 190C. This certainly eased the sticking problem, especially if the frame is oiled and floured before use.

The second bake was similar to the first, but with the sticking problem more or less solved. This helped the loft. It was a lot bolder, too:

Both bakes had excessively thick bottom crusts. I'd baked  with the frame sat on a thin baking sheet which was then placed on my bake stone. So for bake 3, I did away with the bake stone and used another thin steel baking sheet instead. This worked fine.

I also get fed up of nearly white bread and did a 100% sponge enriched dough with 20% freshly milled heritage wheat (Millers Choice) and SD levain along with the yeast.

This solved the rising problem, but introduced problems of its own, with the loaf sides collapsing in with a doughy strata in there as well.

Probably reducing the hydration will solve this. Another problem is that the outer wall of the loaf (in contact with the wood) never rises as high as the inside wall so the loaves are lop-sided - I think this is a known fact.


Although this loaf looks worse than the earlier ones, it's actually very tasty!

So quite a journey - and more to do!

Will I carry on? Sadly, probably not, as I don't find any advantages in the loaves or their flavour. Some say there is a woodyness or smokiness there, but if so, it's very subtle.

It's also quite a chunk of hardware to have lying in the kitchen (somewhere).

Still, it was a good learning curve!

Lance

happycat's picture
happycat

A Yudane Demi-Baguette

I was curious about yudane, a scalding method whereby you take 20% of the flour of your bread and treat it to equal weight of the water from your recipe at boiling temperature and let it gelatinize overnight.

This blog describes my experience doing it. I was very pleased with the results of using a freshly-milled whole wheat kernel yudane in a sourdough baguette. Crispy crust, fluffy crumb, creamy almost buttered flavour and texture with a mellow wheat flavour.

Recipe Source

I've made my own pale imitation of Maurizio Leo's sourdough baguettes weekly for a few months now. I use a 100% hydration dark rye starter. I had to tone down the dough hydration to make it manageable for me (reduced levain from 140 to 115g; reduced added water from 100g to 40g). To enhance flavour I used a 10% rye, 90% AP + gluten. Last week I also did a 10% atta durum blend in addition to the rye.

Hard Wheat Kernels Inspiration

This week, I found hard wheat kernels on sale at Bulk Barn and I bought a kilo to play with. I decided to use a yudane method to handle the fresh milled kernels and all their bran. Part of using yudane method includes increasing hydration to make up for the water locked into the gelatinized dough. So I boosted my levain up to 130g and my added water back to 100g. Since I was using a yudane, I eliminated the added gluten as well.

Grinding Kernels By Hand

Here's 100g of kernels or so in my Porlex coffee grinder. It wasn't too bad grinding out 200g of kernels while watching some TV. It didn't feel that long to me and I certainly wouldn't buy an electric mill for this amount.


Here's the flour post grind... lots of bran.


Making Yudane With Boiling Water

I added 200g boiling water to the 200g of whole grain flour to make a firm paste.


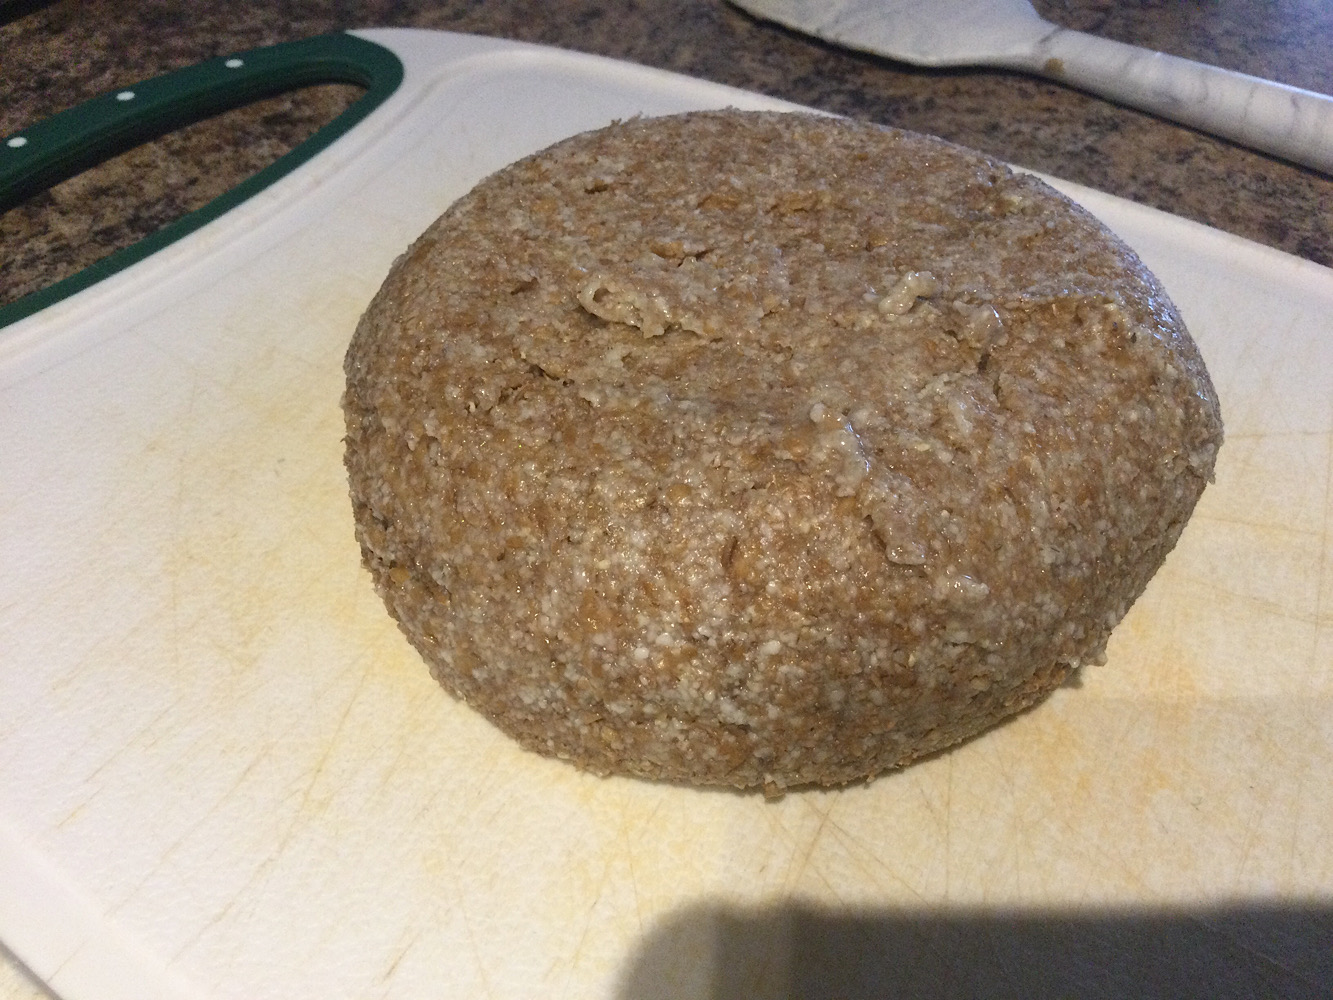
I covered the paste and left it on the counter overnight... a key yudane step. Next morning it was a dark, firm paste. 


Adding Yudane to the Baguette Dough

Making the baguettes I autolyse flour and water for 30 mins then add the salt and levain. In this case the autolyse was all AP.

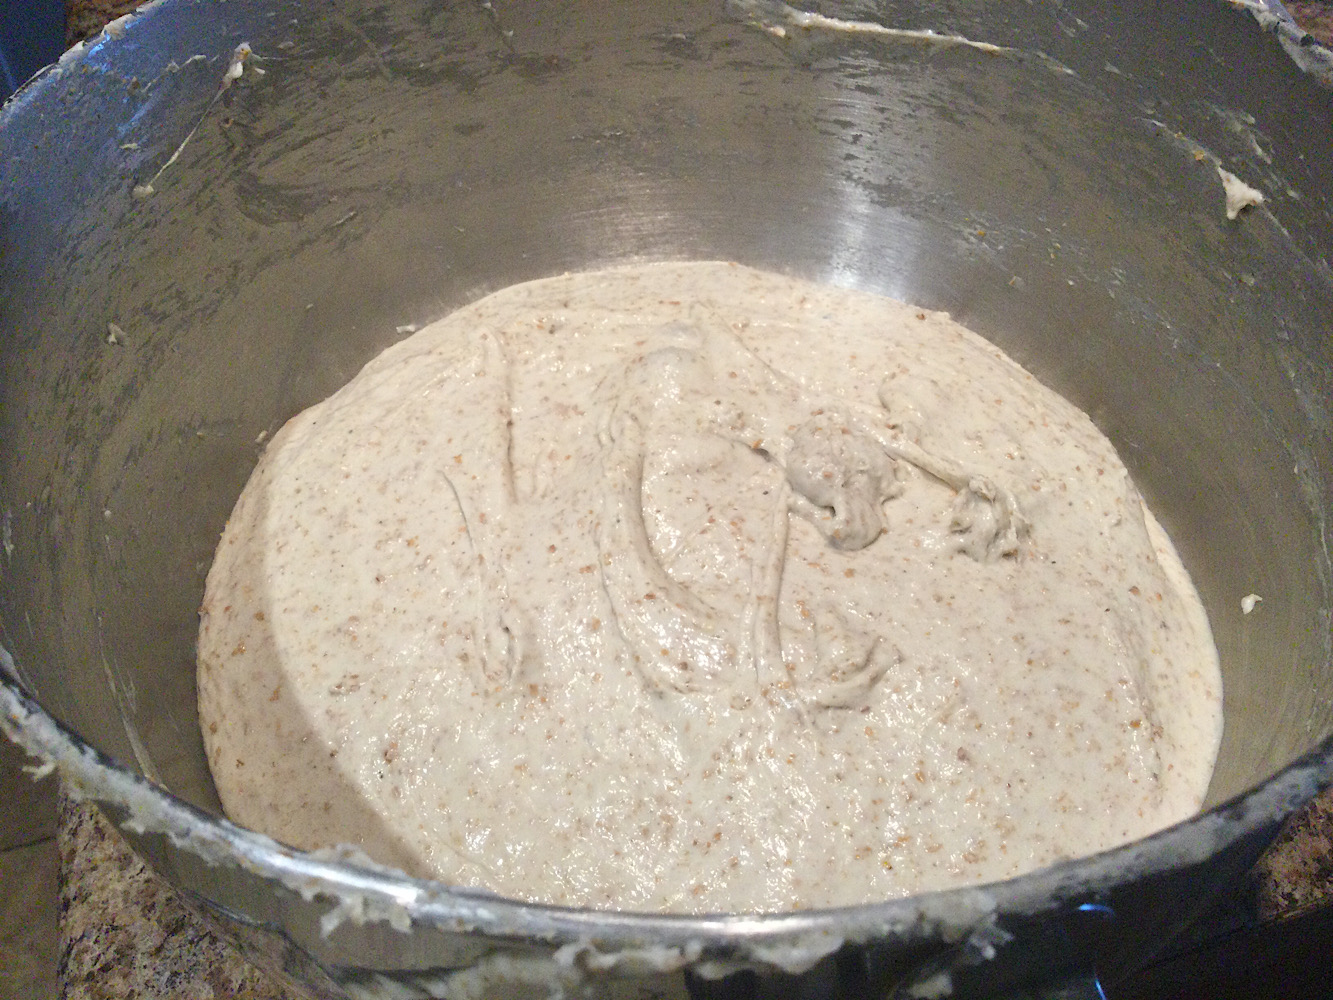
I cut up the yudane paste and added it to the autolyzed flour and water + salt and levain from the recipe. Cutting it up probably didn't help. It took quite a beating to integrate it with the dough. Here's the dough after kneading with the dough hook on a Kitchenaid Pro (5 mins, 15 min rest, 5 mins, 15 min rest, 5 mins). 
 

Retarded Bulk Overnight in Fridge

I did a retarded bulk in the fridge overnight and turned out the dough. It puffed up quite a bit overnight. I divided into 6 x 318g portions and shaped and proofed on pieces of parchment with all the loaves tucked up against each other in a pan.


Baking and Cooling

Preheated the oven to 500f with the baking pan in. Slashed and sprayed dough and loaded 3 onto the pan and turned down to 475 for 25min bake. Kept second set in the fridge, then did them afterward. 

RESULTS: Loaves, Crumb Shots, Taste and Texture

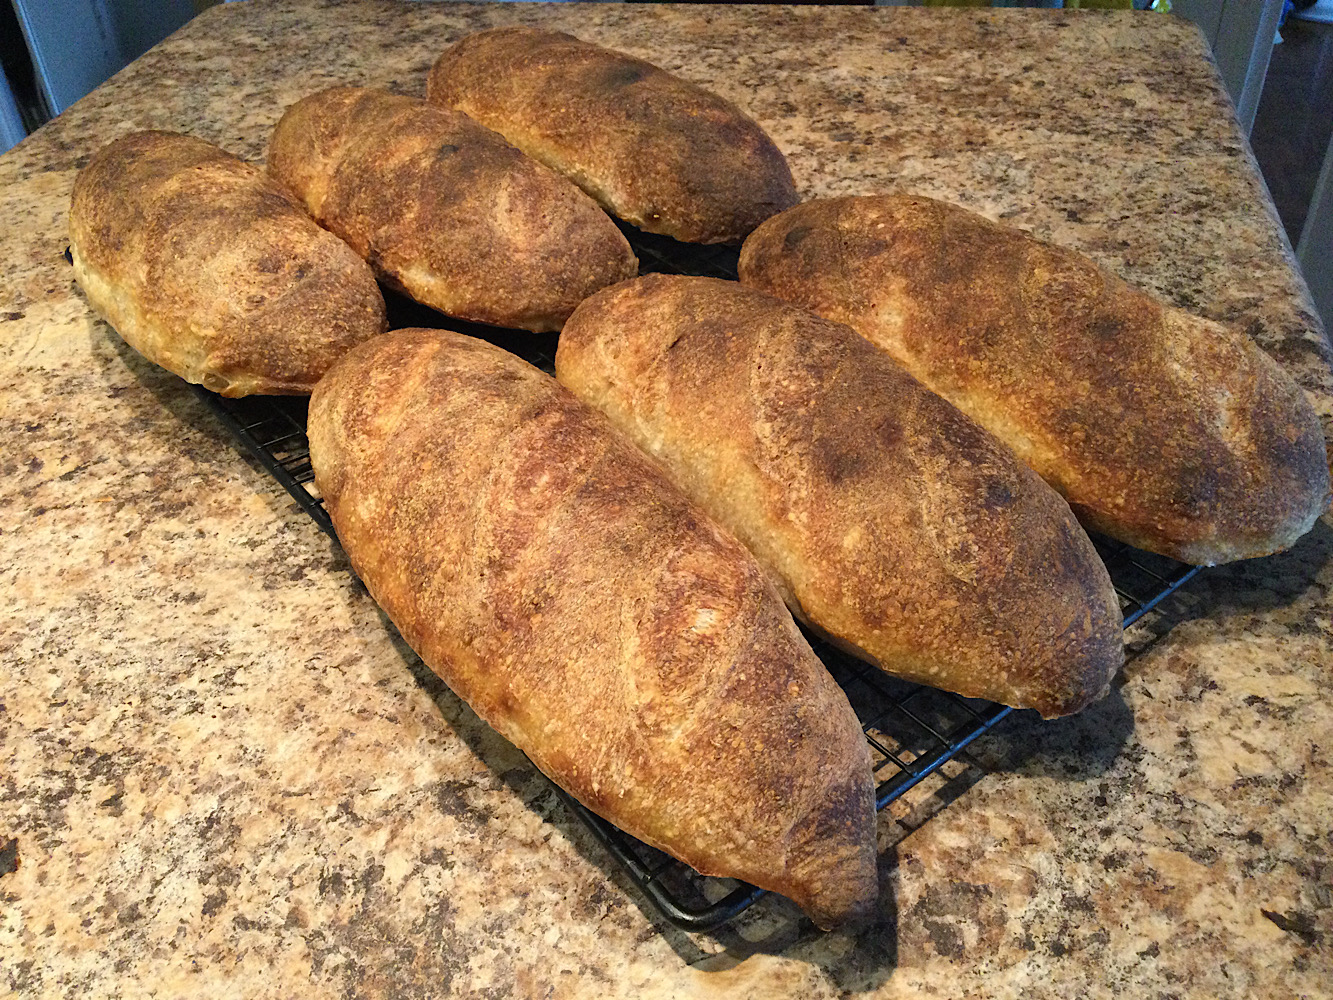
The loaves look the same as the past despite having 20% whole wheat with all the bran, no gluten added this time, and hydration increased.
 

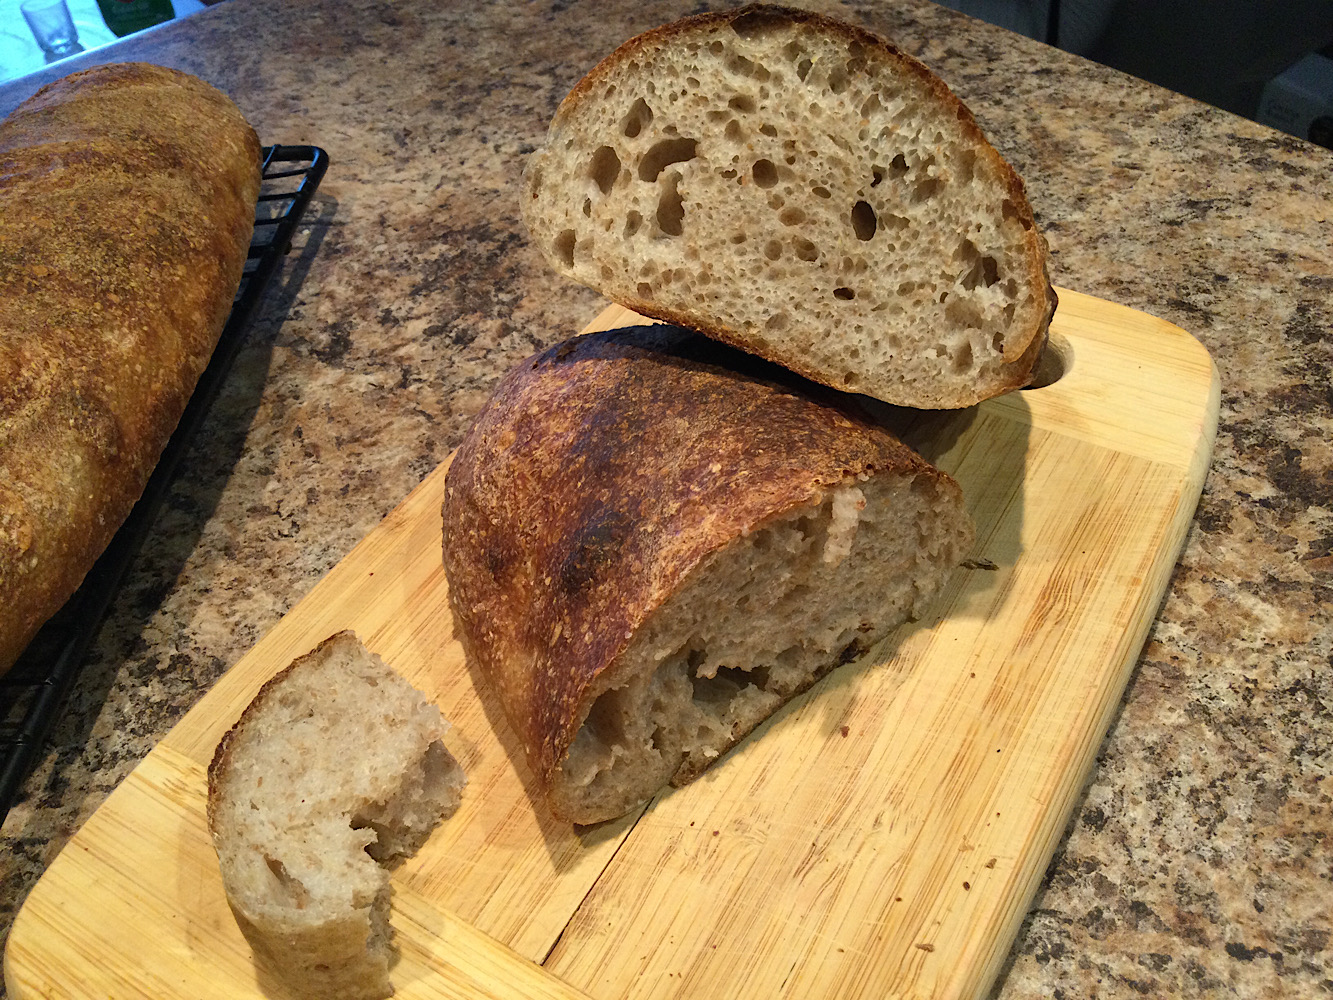
Crumb shot... looks similar to usual for past loaves. The texture was moist almost creamy with a nice soft chew to it that I like, and which is an improvement. Lightly crisp crust which is also an improvement. And the flavour... it's almost tasting like it's buttered. There's a nice whole wheat flavour but it's rounded and mellow. 


Conclusion and Future Direction

I like this version a lot! 

I think I might try a buckwheat yudane as well (lots of flour) and fresh-milled farro (kernels also at Bulk Barn). 

EDIT: next day, thawed a loaf and toasted thin slices for open faced sandwiches, My favorite bread ever... taste and texture, wow. I am a total convert to yudane.

-- David

idaveindy's picture
idaveindy

Oct. 15, 2021.

Goal: 90% WW, no Sharbati this time, 3/8 tsp ADY, 90+ g old dough.

--

A: 9:15 am, mixed 108 g Patel SG WW durum, 81 g H2O, 93 g old dough from previous batch.

B: 10:25 am, mixed 252 g BRM SG WW, 189 g H2O.

108 + 252 = 360 g WW

C: 10:31 am, mixed/kneaded-together A + B.

11:35 am: mixed 50 g H2O + 6 g powdered milk, and kneaded it into C.

Kneaded in 3/8 tsp active dry yeast.

11:50 am: kneaded in 8 g salt, then kneaded in 40 g organic AP flour (Arrowhead Mills.)

Total flour (not counting old dough): 360 + 40 = 400g. 

360 / 400 = 90% WW. 

Total water (not counting old dough) 81 + 189 + 50 = 320g. 

Hydration (not counting old dough): 320 / 400 = 80%.

12:06 pm: kneaded in 5 g grapeseed oil. Let sit in container at room temp.

12:50 pm: put container of dough in fridge.

--

JonJ's picture
JonJ

Gosh. Kicking myself that I hadn't tried out parmesan in my breads before. This bread had a great combination of inclusions: 41g of parmesan cheese, grated from a frozen block. Fresh zest of one lemon, about 3 tsp worth. 2 tsp of dried origanum (marjoram). And 45g of Kalamata olives (13 ea). Incredible smell when it was out of the oven. I couldn't wait the two hours for it to cool. Was cutting into it after 40 minutes, sometimes it is the guilty pleasure of hot steamy crusty bread that is the most enjoyable.

This bread is, once again, a raisin water yeast bread, and once again using the Hamelman recipe from the community bake as the base. For this one though I didn't have time to do a double build. So there was only a single build made using 153g active and fizzy raisin yeast water straight from the fridge, with 169g strong bread flour and 57g atta, other than that (and the different inclusions) it was faithful to the community bake recipe.

The build was used 9 hours later in the final dough, which was mixed all-in-one together with the salt. Had more trouble than usual getting the stand mixer to run 'clean' which is my normal guide to good gluten development. Previously, with the same flours I've done an all-in-one mix with this recipe and had good gluten development after about 8 minutes but this bread ended up getting a whopping 27 minutes of mix time (in 10 minute intervals with some rest between) before I was satisfied. Next time I will pay closer attention as to the order of adding items to the mix, and might do an autolyse or delay the addition of the salt (which is a great tool to tighten the gluten if the dough isn't developing satisfactorily). 27 minutes of mix time is not typical for me, but it certainly built a nice enough crumb!

A lamination was done shortly after the mix and all the inclusions were added in then. There was no opportunity for a coil fold, as bulk fermentation was in a proofer set to 27°C (80°F) and fermentation proceeded quickly. The dough was final shaped 2 hours after the initial mix, and then had an additional 1.5 hours of proof time in the proofer followed by 30 minutes in the fridge whilst the oven completed heating. The final volume increase of the aliquot jar was 200% (in other words, the dough was three times the original volume). I've been pushing the volume increase of these yeast water breads to see what I can get away with lately.

I tried out "Danni's banneton method" where the shaped dough is placed into the banneton seam side down. I like how the dough grew in the banneton after the shaping. The reason why I was trying out this technique was that I've been finding it difficult to score the room temperature dough, especially when it is soft and 'jiggly' as this one was. So the attraction for me of the method is that the bread does not need to be scored with the expectation that it should open up at the seams on the top during the bake. The seams didn't really open on this one very much though. The exterior wasn't exactly ugly, but it also wasn't what I would call charming! At least the bread did not flatten out.

The interior of the bread was lovely. Could taste all of the various flavours and the parmesan and lemon flavours dominated. I might use less lemon next time as it was perhaps a little too strong. There was an interesting layering of the crust at the base of the bread and the crust had that enjoyable glassy brittleness. Not sure if that was from the seam side up method or from the long mix time the dough had.


idaveindy's picture
idaveindy

10/12/2021.  62nd  bake/batch.

The changes here, from the previous bake, are a slight increase in the Sharbati, decreasing the white flour, and less old dough; and I ran out of fresh milk, so I had to use some powdered milk.

  • 326 g bottled spring water.
  • 9 g powdered/instantized fat-free milk, Kroger brand.
  • 3/8 tsp active dry yeast.
  • 65 g old dough from bake #61.
  • 200 g Bob's Red Mill stone-ground (red) whole wheat.
  • 100 g Patel brand stone-ground WW durum.
  • 50 g Swad brand Sharbati Gold.
  • 7 g 50/50 blend of Himalayan pink salt, and standard US iodized table salt.
  • 25 g AP flour, Arrowhead Mills.
  • 25 g bread flour, General Mills.

--

  • Started mixing at 12:30p.
  • Finished mix/knead at 1:19p. Includes rest/soak time for the WW BRM/Patel flour before salt and other flours were added.
  • 1:42 p - Stretch and fold.
  • 2:21 p - put in fridge,
  • 2:50 p - For some reason I thought it needed more time at room temp and took out of fridge.
  • 3:35 p - put back in fridge.

It then quickly rose a lot in fridge, so that extra time at room temp was not needed.

HeiHei29er's picture
HeiHei29er

Lots of firsts in this loaf, so not sure any conclusions can be drawn from any one part of it, but overall, the combination produced a really nice loaf (for me anyway).

- New recipe

- New shaping technique

- New DIY baking steel

- New starter (not really done yet, but I got impatient)


Recipe

Something simple with toasted sesame seeds.  Developed gluten like I normally do, but this time I left the inclusions out until I had decent gluten development instead of adding to the initial mix.  Tried folding them in as part of my final sets of kneading.  It worked OK, but in hind sight I should have laminated them in.  I did two or three extra S&F in the first 90 minutes of bulk to try and further distribute the seeds.  In the end, I think lamination would have been faster and definitely would have produced a more even distribution.


Shaping

I've had trouble recently with the seam opening on my boules.  For this one, I abandoned what I was doing and followed Danni's description on her technique.  Love the look of her natural scored loaves and decided to see if I could duplicate it.  I think it went well.  I only had one seam open, but I'm guessing each loaf will look a little different if I continue using this method.  Regardless, the shaping technique worked well, so will continue to use it whether I proof seam side up or down.


DIY Baking Steel

Picked up a piece of 1/4" plate from a local machine shop.  Had them cut it 15" x 20", which fills one of my oven trays with about a 1.5" air gap on either side.  I filed down any sharp/rough edges and sanded off any corrosion products.  Applied a thin film of canola oil and baked it at 400 deg F for 1 hour.  For my oven set up, I have a large cookie sheet to act as a heat shield/steam tray on the bottom shelf, the baking steel two spots above that, and another large cookie sheet as a heat shield on the top tray.  1 cup of boiling water goes into the steam tray at the start of the bake.


Starter

Working on a new starter that you can read about here.  Wanted to try out the new baking steel, so decided to use some of the new starter as it's developing.


Loaf turned out great!  I'm pretty sure it's the tallest hearth loaf I've ever made, and it is definitely the tallest round loaf.  First slice was right down the middle, and it looks like I trapped a big bubble either during final shaping or with one of the S&F.  The next slice into the loaf is the crumb I like to see, so overall happy with how the loaf turned out.  Too many firsts for me to say any one item had a certain effect, but hoping I can reproduce the overall result on the next bakes.  The low whole grain flour content  probably helped in the loaf height department too.  :-)


Kistida's picture
Kistida


My starters are usually fed a variety of flours depending on what I fancy. During rye+ap week, I made these orange-y loaves with the last of the flours I had.


I prefer the swirly loaf more than just a plain one with more rye, probably because it’s more fun to make, easier to handle, tastier and prettier. The other one had more rye (50-60% I believe) and was a bit more dense. We used these as sandwiches and for dipping in tikka masala gravy and soups.

Swirly rye and Kamut loaf
Tangzhong
20g all purpose flour
100g milk

Dough
All of the Tangzhong
270g starter (50% hydration rye+ap)
85g milk
1 large egg*
20g sugar
3g orange zest (or more!)
90g rye flour
68g Kamut
87g all purpose flour
5g vital wheat gluten
8g salt
10g light olive oil
30g unsalted butter

Mocha dough
To 40% of the dough: Make a paste of 1g espresso powder, 5g cocoa powder and 1 tsp water. Add 2g caraway seeds into the paste. Mix into dough.

*wasn’t quite sure why I added this. Just more milk would've been ok :D


Last week, I made my espresso cinnamon buns into mini rolls with coffee cookie topping, no lamination. I should've used a simpler method to shape these bite-sized buns for a more uniformed appearance. Either way, they disappeared quick thanks to their tiny size.

Mini espresso cinnamon buns with coffee cookie topping
- 34 mini rolls

Tangzhong
20g all purpose flour
100g milk

Dough
All of the Tangzhong
95g soured milk
10g sugar
1 large egg
1/2 tsp vanilla extract
200g all purpose flour
120g Kamut flour
6g salt
5g instant yeast
40g unsalted butter
10g light olive oil

Filling
20g unsalted butter, melted
50g brown sugar
15g all purpose flour
1 tsp ground cinnamon
1/2 tsp espresso powder

Coffee cookie topping
- whip wet ingredients with sugar, then fold in dry ingredients

80g unsalted butter
1 large egg
60g sugar
3 tsp espresso powder dissolved in 2 tsp warm water
70g all purpose flour
10g cornstarch
1/4 tsp baking powder


20-30g dough per bun: Roll out, fill, shape into rolls/buns. Pipe cookie topping over each roll/bun (a specific pattern would be enough, but I went overboard with the piping, it's a tasty topping after all!). Bake at 180°C for 15 minutes until edges are golden brown and the internal temperature is at least 88°C. Turn off the oven, leave the oven door slightly ajar and leave the buns to continue baking in the cooling oven for 5 to 10 minutes. Then, remove the buns from the oven and let them cool completely on a cooling rack.


The next bake were kimmichers, idea from a post: https://www.thefreshloaf.com/node/68901/kimmicher and adapted from https://www.ploetzblog.de/2020/12/05/kimmicher/

Kimmicher with sourdough and instant yeast
The last of my rye flour went into the first batch of these tasty rolls. And I used 35°C water since it was 19-20°C in the mornings when I was preparing the doughs. Each were 25-26°C after mixing.

makes 4 x 150+g or 3x 200+g rolls
Version 1
240g sourdough starter (100% hydration 1:1: rye:atta)
100g all purpose flour
50g spelt flour
80g atta flour
115g water (35°C)
7g salt
1g instant yeast
15g light olive oil
5g caraway seeds

Version 2
240g sourdough starter (100% hydration 1:1 spelt:AP)
45g all purpose flour
115g spelt flour
70g atta flour
115g water (35°C)
7g salt
1g instant yeast
15g light olive oil
5g caraway seeds

230°C 20 minutes with steam, 5 to 10 minutes without. Each roll was sprayed with a thin mist of water right out of the oven and left to cool. The rolls took on a light matte shine once cooled.


Since my tiramisu attempt in the last post, I decided make it again with lesser eggs, using pastry cream, whipping cream, mascarpone, sponge cake and coffee syrup. I'm not sure about the fats in this version (why on earth would I count...) but there's surely less eggs - 3 eggs in the sponge and one in the pastry cream :D On second thought, the pastry cream can be omitted for a lighter filling.

Tiramisu roll cake
Mascarpone cream
100g pastry cream (if skipping this, add 20g confectioner's sugar, or to taste)
100g whipping/heavy cream
150g mascarpone (I made a batch from 450g cream)
1 tbsp Frangelico

Vanilla sponge
- adapted from https://www.womanscribbles.net/vanilla-swiss-roll/
- half sheet pan, 180°C/350°F 9-12 minutes

20g sugar
80g buttermilk
30g light olive oil
1/2 tsp vanilla extract
70g all purpose flour
10g cornstarch
1 tsp baking powder
a pinch of salt
3 egg yolks
3 egg whites
40g sugar
1/2 tsp lemon juice

Easy pastry cream
- heat 2/3 the milk and sugar, then temper with remaining milk-egg-cornstarch and salt mixture.
- cook the mixture until 93°C/200°F and let it linger around this temperature for least 1 minute
- stir in vanilla and butter. Cool completely before use.

220g milk, divided
50g sugar
1 large egg
25g cornstarch
a pinch of salt
1/2 tsp vanilla extract
15g unsalted butter, room temperature

Coffee syrup
100g espresso
50g sugar
1 tbsp Kahlua

Once the sponge is baked, trip the edges for smooth sides - the trimmed edges were used in a mini tiramisu cake.
Dust it with sugar (confectioner's) and roll it up in parchment paper while hot.
Once cooled, brush the sponge cake with coffee syrup - 2 to 3 times. Spread cream and lightly dust with cocoa powder before rolling up the cake. Pipe cream over the rolled cake and draw designs on it or leave it smooth. Dust with cocoa powder before letting the cake chill for at least 4 hours before serving.

Pages

Subscribe to RSS - blogs