The Fresh Loaf

A Community of Amateur Bakers and Artisan Bread Enthusiasts.

Benito's blog

Benito's picture
Benito

I know I’ve made this before but I wanted to see if my techniques have improved at all with more baking and for this dinner I wanted a simple sourdough without a lot of whole grain or other flavours added to the bread.

This was my best looking sourdough ever.  I hope it isn’t underproofed as it didn’t rise as much as I expected during the cold fermentation last night.

For one 750 g loaf

311 g white bread flour

46 g whole wheat flour

21 g dark rye flour

287 g warm water reserve 21 g for later

7.5 g salt 

77 g levain 


Levain Build 

35 g mature starter

35 g bread flour

35 g whole wheat flour


70 g filtered water 


I’m sure most of you have looked at this recipe on The Perfect Loaf website but I will post it here if someone wants it.


I did slap and folds for 7 minutes and then over the course of two hours did three sets of coil folds.  This was the first time I did coil folds and never combined the slap and folds with the coil folds.  I think I will employ this from now on.


I made a couple of videos showing my coil folds and then final shaping.  I’d be happy if you could offer advice on doing things better, I won’t be offended whatsoever.  If I look so hesitant when doing both the coil folding and final shaping it was because I was hesitant and scared of doing it wrong.  That was the first time I used that final shaping method and I think it created more tension than how I was doing it before.


Me coil folding the final time for this bake.


https://youtu.be/w2VdvfXknjs


Me shaping the batard using this method for the first time.


https://youtu.be/rMeiUjSlWRg


Hopefully the crumb looks good.  Fingers crossed.

Benito's picture
Benito

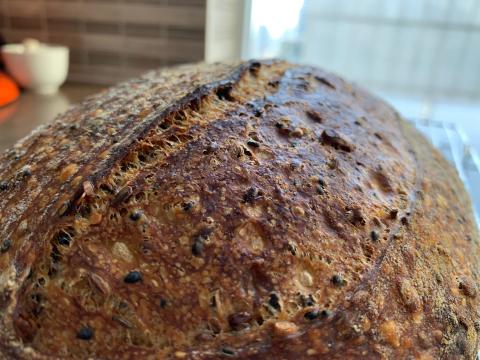
I baked the Seeded Sourdough recipe from The Perfect Loaf.  I didn’t get the oven spring that I should have because I tore the skin on the dough when I was pre-shaping.  I was having too much fun and did too much during pre-shaping, there was no need whatsoever to try to get it as perfectly round as I was doing.  Silly mistake.  Unfortunately that meant that when I unloaded the dough from the banneton, I kind of flattened more than it should have and of course, it didn’t get the rise it should have as well.  Fortunately, I read the fermentation well enough and the crumb and crust are both to my liking.


Ingredients for 750 g loaf (not including seeds)

296 g bread flour

62 g semolina

29 g whole wheat flour

301 g water (reserve 44 g for mixing later)

8 g salt 1.41 tsp salt

55 g levain

16 g flax seeds

16 g toasted dark sesame seeds

5 g fennel seeds

22 g raw sunflower seeds (not roasted or salted)

Zest of one lemon


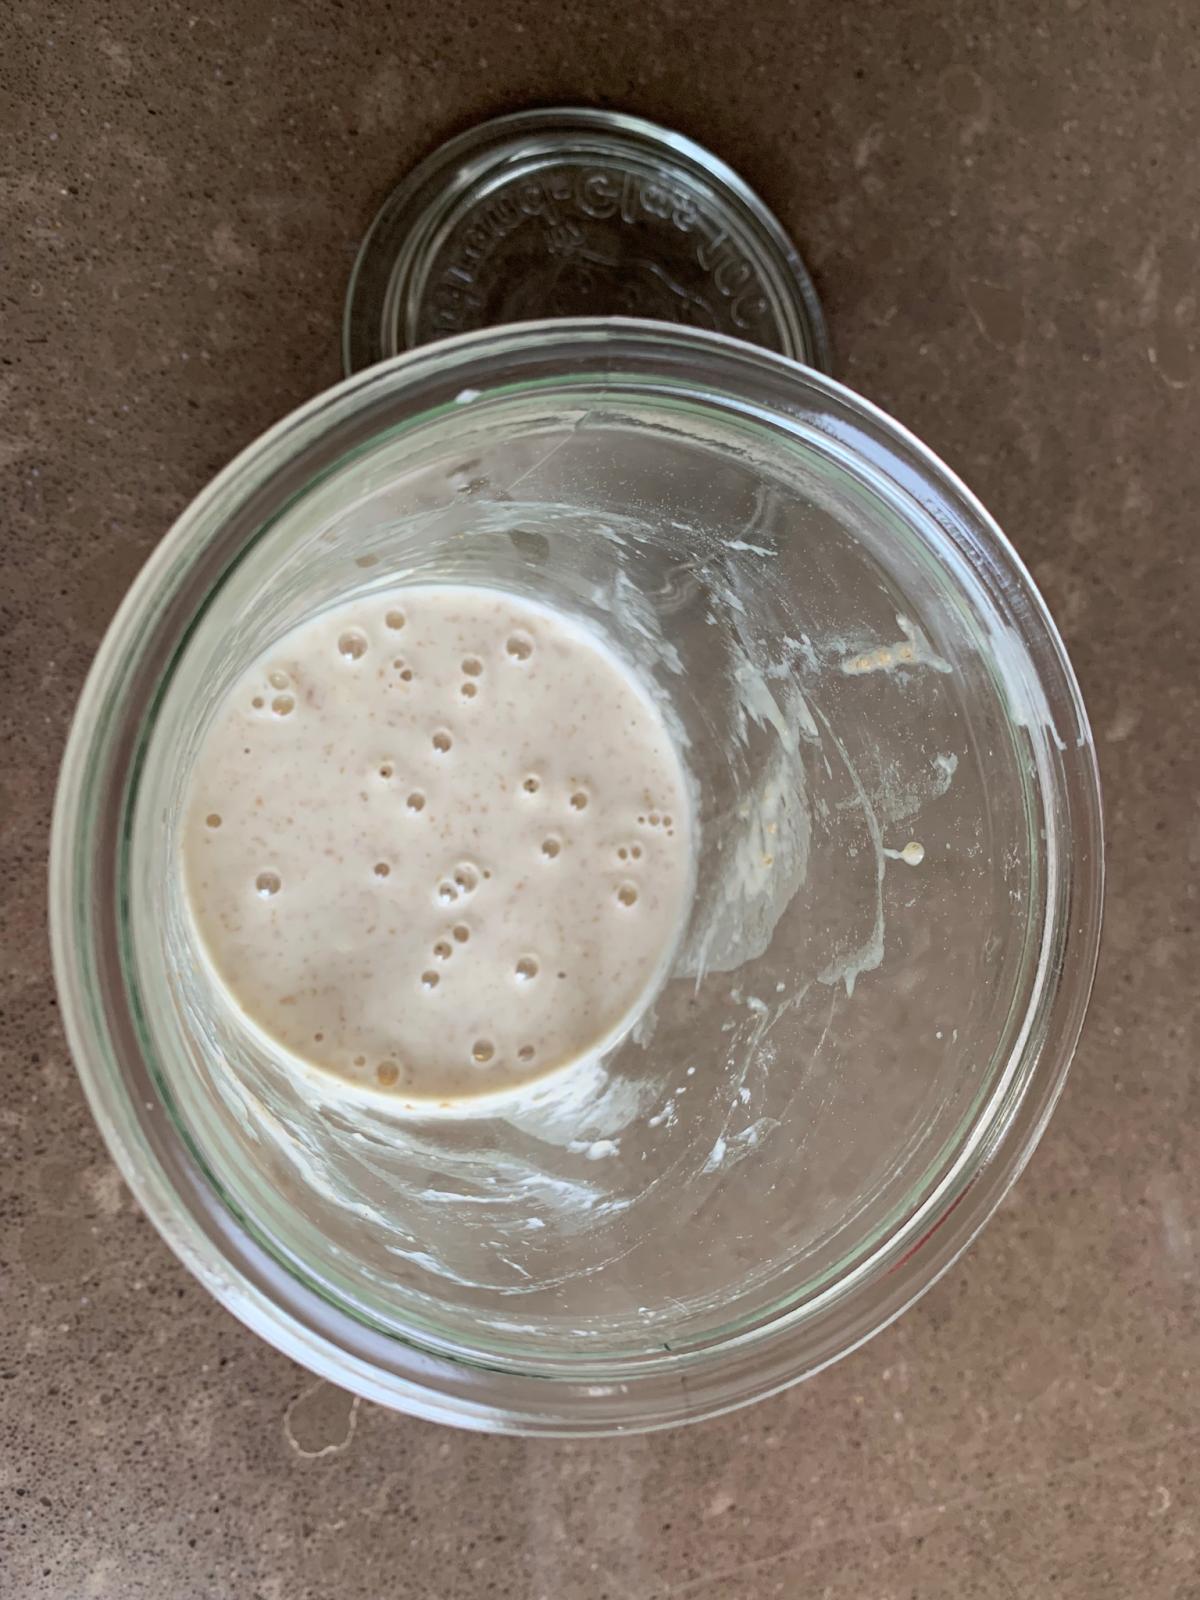
Levain build for 750 g loaf

20 g starter

20 g whole wheat flour

20 g bread flour

40 g water


Method

1. Levain – 9:00 a.m.

Build the liquid levain (everything listed in the Levain Build section above) in the morning and store somewhere around 75-78ºF ambient.

2. Autolyse – 3:00 p.m.

Mix flour and water (reserve 100g water for the mix, later) in a bowl until all dry bits are hydrated. Cover bowl and store somewhere warm (around 75-78ºF) for 2 hours.

3. Prepare Seeds – 3:10 p.m.

After you’ve mixed your autolyse, prepare the seed mixture. Turn on your oven to 350ºF and let it preheat while you measure out all the called for seeds.

Once your oven is preheated spread the dark sesame (only these) on a quarter baking sheet and toast in the oven at 350ºF for 10 minutes. Keep an eye at the end of this to prevent any burning. Remove and set somewhere to cool.

Set a kettle of water to boil on the stove. Once it’s just about boiling pour 150g of hot water (not boiling) over the flax seeds in a bowl and let sit to cool. Once this water is cool to the touch, mix in the cooled sesame and fennel. Let this mixture soak until called for in the bulk fermentation step.

Note that I didn’t incorporate the raw sunflower seeds into the water soaker, you could do this if desired.

4. Mix – 5:00 p.m.

By the time we will use the seed mixture they will have absorbed the entire 150g of water they were soaking in. Knowing this, you should expect the dough to be a little slacker later in bulk when the seeds are incorporated as they start to release a little water into the dough. To combat this we will build additional strength in this dough at the start.

Add the 55 g levain to the top of your dough and using some of the reserved 44 g water wet your hands and mix the levain in thoroughly.

I chose to do slap and fold for about 5 minutes, just until the dough starts to show signs of a smooth surface and it’s catching some air. If you aren’t comfortable with slap/fold method or don’t like it, you can do stretch and folds in the bowl until your dough tightens up and slightly hard to stretch out and fold over. Medium development.

When finished mixing, sprinkle the salt on top of the dough and use the remaining water to help dissolve. Pinch through a few times and fold the dough over itself to help incorporate.

Transfer dough to a tub or thick-walled bowl for bulk fermentation.

5. Bulk Fermentation – 5:10 p.m. to 8:50 p.m.

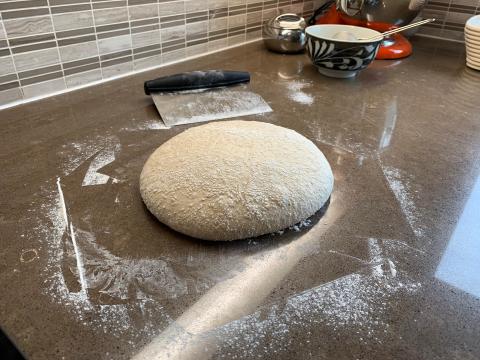
At 76-78ºF ambient temperature bulk fermentation should go for a little less than 4 hours. Keep an eye on the dough, for me, fermentation was moving rather rapidly and the dough became extremely puffed up (see preshape photo below).

Perform a total of 4 sets of stretch and folds during the bulk, spaced out by 30 minutes. If the dough feels extremely slack to you at the end of the 4th set, do another set for a total of 5. After the fourth or fifth set of stretch and folds let the dough rest for the remainder of bulk. Keep an eye on the dough nearing the three to three and a half hour mark during bulk fermentation, it will rise quite a bit and could rise up all the way to your plastic or towel covering your bowl. It helps to use a larger sized bowl for this dough!

After the second set of stretch and folds (1 hour into bulk) add in the seed soaker and zest of two lemons (optional).  (I think I’ll add the seeds and lemon zest during the second set of folds layering them in portions during each stretch and fold). I’ll typically do my folds, spread the seeds evenly on the top of the dough and then with wet hands massage it gently into the dough. Fold it in thoroughly

6. Divide & Preshape – 8:50 p.m.

Dump out the dough from your bulk container onto an un-floured work surface. Pre-shape the dough into two round boules and let rest 20 minutes uncovered.

I want to warn you that the dough can be very sticky here at this point. Use plenty of flour on your hands and rely mostly on your bench knife to bring the dough into two taut boules.

7. Shape – 9:10 p.m.

To coat the outside of your loaves with seeds (optional) as I’ve done, lay out a towel next to the shaping area that’s covered with a seed mixture. Take equal parts raw black sesame (don’t use the toasted ones, these will bake in the oven on the outside), flax and fennel, and mix together in a bowl. Spread this mixture out in the center of the towel evenly into a thin but cohesive layer. I didn’t include sunflower seeds in this mixture as I prefer the look of this bread with only small seeds on the exterior — personal preference. After the dough is shaped we will quickly roll the top of each batard or boule in this mixture.

I prefer to shape these as a batard, as follows:

  1. Flip pre-shaped round
  2. Fold bottom up to about halfway
  3. Fold the left side over to about 3/4 to the right
  4. Fold right side over to cover left
  5. Stretch top up & away from the center and fold down to about half (you’ll now have a “letter”)
  6. Grab a little of the dough at the sides near the top and stretch it over the center so the dough crosses. Imagine lacing up a shoe where you first grab your laces and cross them over
  7. Repeat 3 times from top to bottom (the result will look like a laced up shoe)
  8. Take the bottom and gently roll the dough up to the top and try to seal it slightly when done rolling

For more instruction on how to shape this dough as an oblong loaf, see my post on how to shape a batard (with video!).

Once you’ve shaped your dough lightly spritz the top with a water mister, this helps the seeds stick to the exterior. Then, using your bench knife scoop up your dough and invert it so the seam side is facing up onto the towel with the seed mixture. Roll it around gently to coat and then transfer seam-side-up to your final proofing basket.

Coating the outside is a little hectic at first, but you get the hang of it after a few tries.

8. Rest & Proof – 9:15 p.m.

Cover your baskets with plastic and then retard in the refrigerator at 38ºF for strictly 10 hours. Even at such cool temperatures this dough can quickly overproof so keep an eye on it in the fridge in the morning. By the morning my dough was very gassy and had risen quite a bit in the fridge.

9. Bake – Next Morning: Preheat oven at 6:15 a.m., Bake at 7:15 a.m.

Preheat oven for one hour at 500ºF.

Scoring this bread can be difficult because the seeds form a hard crust on the outside. Get the blade into the dough and move quickly down to make a score. If the blade slips out of the cut just continue where it left off and keep it going.

To make a double-score as you see below, make two straight, vertical slashes on the top of the dough. The top one starts near the top-left of the dough and goes down halfway, the second one starts a little higher than where the first one left off and goes down straight almost to the bottom of the loaf. To visualize this hold your two index fingers out in front of you so the tops of your fingers are at the same height. Then shift your right hand down until your right fingernail lines up with your left finger’s middle joint — your two scores are the entire length of your index fingers.


Bake the loaves at 500ºF for 20 minutes, then remove the steaming pans from inside the oven. Turn the oven down to 450ºF and bake for an additional 30-35 minutes until done to your liking. Remove from the oven and cool on a wire rack for at least 1-2 hours.

Benito's picture
Benito

This sourdough has a lovely light orange crumb.  I modified the original recipe which was 100% white flour and instead used a combination of white bread, whole red fife and whole rye flours.  The tomato paste is complimented with rosemary and celery seeds, I couldn’t find nigella seeds so subbed celery seeds, but I think nigella would have been better.

311 g white bread flour

46 g whole wheat flour

21 g dark rye flour

2 tbsp freshly chopped rosemary leaves

3 g celery seeds

287 g warm water reserve 21 g for later

31 g tomato paste

1.5 teaspoon olive oil

7.5 g salt 

77 g levain 


This is only the second sourdough loaf that I’ve baked that has had any sort of an ear on it.  I think I’ve improved my final shaping a bit, I believe I hadn’t been using enough flour on my hands causing my hands to stick to the relatively high hydration dough.  Secondly, I think I hadn’t been scoring deeply enough.  The best part of the ear on this loaf was where I scored the deepest.  I hope that things will continue to improve from here with more baking.

Benito's picture
Benito

I didn’t make anything with my sourdough discard last weekend and my container of discard was almost overflowing after baking the tomato sourdough bread today.  I decided I’d try a variation on the crackers with another flavour that I hadn’t tried yet.  

Grana Padano Sesame Seed Sourdough Crackers


The final dough for these crackers should be soft but not sticky.  The sourdough discard is 100% hydration.


Ingredients 

150 g sourdough discard

75 g bread flour

20 g sesame seeds

10 g poppy seeds

30 g butter 

15 g olive oil

35 g Parmesan fresh fine grated 

Pinch of cracked black pepper

Pinch of sea salt


200 g sourdough discard

100 g bread flour

27 g sesame seeds

13 g black sesame seeds

40 g olive oil

47 g Grana Padano fresh fine grated

Pinch of cracked black pepper

Pinch of sea salt


Throw all ingredients into a bowl and combine until forms a ball.

Let rest for at least 30 minutes and divide into balls.  Roll between two sheets of parchment paper.

Spritz with water and then sprinkle sea salt.


Bake at 350ºF for 12-15 mins until nice, golden and crisp.


If you try these I hope you like them.

Benito's picture
Benito

This is a new recipe for me, the first time I made a whole grain pastry and first time baking a pie with plumcots.  The whole wheat pastry recipe is by Stella Parks, although as with her regular pie crust recipe I increase everything by 25% to ensure that I had plenty of pastry dough since my experience with her regular pastry was that there wasn’t quite enough.

Ingredients

  • 4 ounces all-purpose flour (about 1 cup minus 1 tablespoon; 110g)
  • 4 ounces whole wheat flour (about 1 cup minus 1 tablespoon; 115g), plus more for dusting
  • 1/2 ounce sugar (1 tablespoon; 15g)
  • 1 teaspoon (4g) Diamond Crystal kosher salt; for table salt, use half as much by volume or use the same weight
  • 6 ounces unsalted butter (about 12 tablespoons; 170g), cold
  • 5 ounces cold tap water (1/2 cup plus 2 tablespoons; 140g)


For 25% greater weight pastry dough

138 g all purpose flour

144 g whole wheat flour

19 g sugar

5 g salt

15 tablespoons butter unsalted 

175 g cold water


Directions

1.

For the Dough: Whisk all-purpose flour, whole wheat flour, sugar, and salt together in a medium bowl. Cut butter into 1/2-inch cubes (this size is important, as smaller pieces will melt too fast) and toss with flour mixture to break up the pieces. Using your fingertips, smash each cube flat—that's it! No rubbing or cutting. Stir in water, then knead dough against the sides of the bowl until it comes together in a shaggy ball. Dough temperature should register between 65 and 70°F (18 and 21°C); if not, refrigerate briefly before rolling and folding (see note).


Make the Layers: On a generously floured work surface, roll dough into a roughly 10- by 15-inch rectangle. Fold the 10-inch sides to the center, then close the newly formed packet like a book. Fold in half once more, bringing the short sides together to create a thick block. Divide in half with a sharp knife or bench scraper. Dough temperature should still be somewhere between 65 and 70°F (18 and 21°C); if not, refrigerate briefly before proceeding (see note).


For Single-Crusted Pies: Using as much flour as needed for dusting, roll one piece into a 14-inch circle and drape across a 9-inch pie plate; it will be super easy to lift by hand. Dust off excess flour with a pastry brush, using it to nestle dough into the very corners of the pan. With scissors or kitchen shears, trim the edge so that it overhangs by 1 1/4 inches all around. Fold overhang over itself to create a thick border that sits atop the rim of the pan. Crimp or shape crust as desired. Repeat with remaining dough. Wrap with plastic and refrigerate at least 2 hours and up to overnight. Use as directed in your favorite recipe.


For a Double-Crusted Pie: Using as much flour as needed for dusting, roll one piece into a 14-inch circle and drape across a 9-inch pie plate; it will be super easy to lift by hand. Dust off excess flour with a pastry brush, using it to nestle dough into the very corners of the pan. With scissors or kitchen shears, trim the edge so that it overhangs by 1 inch all around. For a solid top crust, roll remaining dough as before, or roll into a 9- by 15-inch rectangle for a lattice-top pie. Transfer the entire sheet, uncut, to a baking sheet or parchment-lined cutting board. (The parchment will prevent dough from absorbing any savory odors from the board.) Wrap both portions in plastic and refrigerate at least 2 hours and up to overnight. Use as directed in your favorite recipe.


For a Blind-Baked Pie: Adjust oven rack to lower-middle position and preheat to 350°F (177°C). Line chilled pie shell with a large sheet of aluminum foil, pressing so it conforms to the curves of the plate (a second sheet of aluminum may be needed for full coverage). Fill to the brim with sugar, transfer to a half sheet pan, and bake until fully set and golden around the edges, 60 to 75 minutes. Fold long sides of foil toward the middle, gather short sides, and use both hands to carefully transfer sugar to a heat-safe bowl. Let sugar cool to room temperature. If needed, continue baking crust a few minutes more to brown along the bottom.


Filling


¾ cup 149 g sugar

3 tbsp tapioca starch

2 tsp grated lemon zest plus 1 tbsp juice

1 teaspoon grated ginger

¼ teaspoon ground ginger

¼ teaspoon table salt

2 ½ lbs plums, pitted and cut into ¼ inch thick wedges skin on

1 large egg, lightly beaten with 1 tablespoon water


Instructions

For the Filling:  Adjust oven rack to middle position and heat oven to 400 degrees.  Whisk sugar, tapioca starch, lemon zest, fresh ginger, ground ginger, and salt together in a large bowl.  Stir in plums and lemon juice and let sit for 15 mins.  Spread plum mixture into even layer in chilled dough-lined plate.


Bake pie on aluminum foil lined rimmed baking sheet until crust is golden, 20 to 25 mins.  Reduce oven temperature to 350 degrees and continue to bake until juices are bubbling and crust is deep golden brown, 35 to 50 mins longer.  Let cool on wire rack until filling has set.


Total time was around 1 hour 20 mins.


Next time, macerate the plums in the sugar, lemon zest, fresh ginger, ground ginger and salt in a ziplock bag overnight adding the lemon juice and tapioca starch prior to baking.  The plums really reduced in size while baking resulting in a large air gap under the crust.  Macerating them overnight should avoid the gap.


I’ve never seen a plumcot pie before and this pie was really good, hope you give it a try.

Benito's picture
Benito

I based my recipe on Maurizio’s Fifty-Fifty Whole Wheat Sourdough Bread.  I decided to lower the whole wheat just a bit.

For single loaf weight 750 grams 40% Red Fife

Weight

Ingredient

Baker’s Percentage 

151 g

Red Fife Stoneground

40%

227 g

White Bread Flour

60%

310 g

H2O @ 90ºF 

82%

9 g

Fine Sea Salt

2.3%

54 g

Mature Liquid Levain

14.14%


Hold 50 g of water


Levain for single loaf weight 750 grams

Weight

Ingredient 

Baker’s Percentage

30 g

100% hydration starter

100%

15 g

Red Fife Flour

50%

15 g 

Bread Flour

50%

30 g

Water

100%

I started the Levain and autolyse at the same time.  With a room temperature of around 80ºF this ran for about 4.5 hours.

I then added the levain to the autolysed dough working it in using half of the hold back water.  Then sprinkled the salt on the dough and worked it in with the remaining hold back water.  

Next for 5 minutes I did slap and folds for the first time.  This was interesting to do and I think it might have been easier if I was making a larger loaf.

Bulk fermentation went for about 5 hours and I did 5 sets of stretch and folds during the first 2 hours or so.  

Once bulk was completed and the dough was bubbly I did an initial shaping.  After a bench rest of 20 minutes I shaped into a batard and placed in the banneton.  The banneton was put into a plastic bag and left on the counter for 30 minutes before placing it into the fridge for about a 16 hour cold fermentation.

After heating my cast iron Dutch oven in my oven for 1 hour at 500ºF I inverted the banneton onto a sheet of parchment and used a butter knife to remove excess rice flour.  I then spritzed the dough with some water and then scored the dough.  I quickly placed the dough into the Dutch oven and baked at 500ºF for 20 minutes.  I then removed the lid and dropped the oven temperature to 425ºF baking for a further 20 mins at which time I took the loaf out of the oven and placed on a baking rack.

This is the first loaf I have made that had any sort of ear, so I’m excited that maybe I’m getting a better handle on final shaping.  Hopefully I can build on this success and get even more tension on the skin of the dough to get even better oven spring and better ears in the future.

Benito's picture
Benito

A bit of background about me, I quite new to bread baking having only really starting this year and having some success following the methods of Peter Reinhart in Artisan Breads Everyday for commercial yeasted breads.  I decided that I would like to try sourdough and if I was going to do that I would also try my hand at making a sourdough starter.

My first attempt didn’t seem to work out, I followed Peter Reinhart’s instructions from Artisan Breads Everyday, but after several days and little apparent activity I gave up and started again.

My second attempt I followed Peter Reinhart’s instructions for a seed culture again and things were going fairly well, however, the phase 4 seed culture seemed to have only a bit of vigor.  After two days in phase 4, I decided to discard all but 100 grams of the seed culture, which had a very pleasant acidic smell and then added 100 g of water and 100 g of unbleached bread flour.  I am hopeful that this will become more vigorous with regular 1:1:1 feedings.  I should say, I didn’t really know any better and started this with all purpose whole wheat flour that wasn’t organic.  I will keep this one fed and going and see what happens.

 Now my third attempt, but this time with Sourdo Lady’s instructions found on this site.   I found some organic sprouted rye flour at Whole Foods and decided I’d use this flour to make a seed culture.  Hopefully third time’s a charm. 

I will try to update with photos in the next days of my adventure.

Pages

Subscribe to RSS - Benito's blog