The Fresh Loaf

A Community of Amateur Bakers and Artisan Bread Enthusiasts.

Most bookmarked

zolablue's picture
zolablue

Firm Sourdough Starter - Glezer recipe

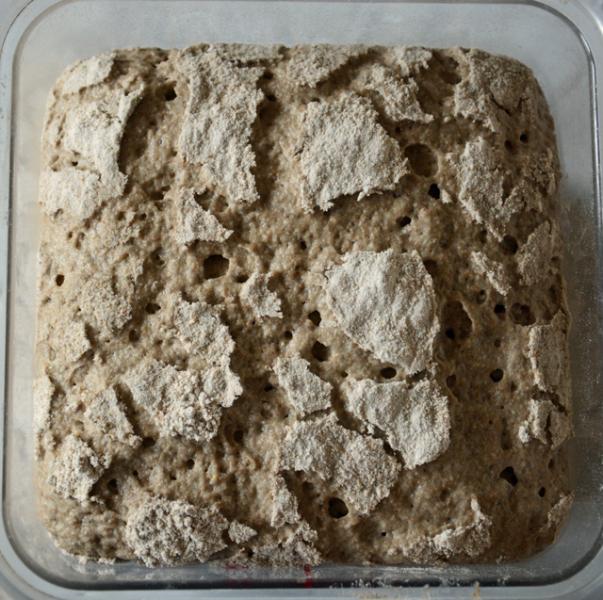
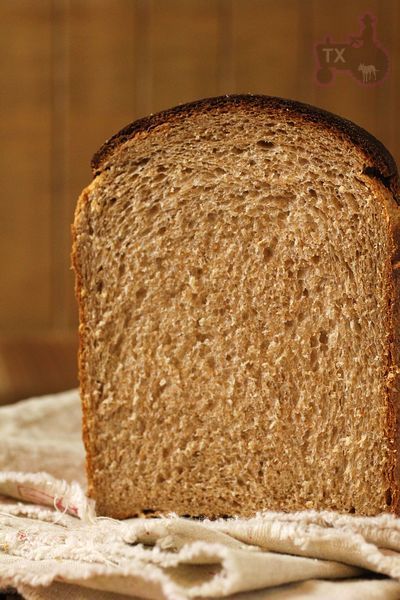
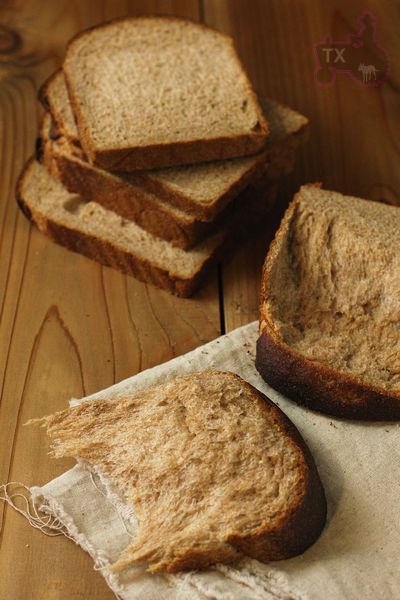
I’m finally getting around to posting Maggie Glezer’s firm sourdough starter recipe.  For those of you having problems with your starters you might wish to give this a try.  Most people here are using batter-style starters so it might be interesting to see if there is any discussion on firm starters.  Plus I need help in learning to convert properly for use in recipes which don’t use a firm starter and there are always questions that come up. I have photographed my starter from mixing the dough ball and pressing it into the pint-sized jar through several hourly increments where you can see how grows and finally it quadruples in 8 hours, or in this case just short of 8 hours, which is the “gold standard” Maggie talks about for a firm starter to be ready to leaven bread.


I realize there are many opinions and methods on sourdough starters and this is only the one I’ve chosen and that works for me.  But as many of you know, I’m a bread newbie and a sourdough newbie and I’m interested in all the information.  Some of you were asking about a firm starter so thought this might help. 

PHOTOS on firm starter: 

http://zolablue.smugmug.com/gallery/2617049#138085923

(NOTE: Edited to correct recipe 9-25-07 so if you copied it prior to this date please recopy and accept my apologies!)

SOURDOUGH STARTER DIARY – © Copyright, Maggie Glezer, Blessing of Bread

(How to make sourdough bread in two weeks or less)  

To begin a starter, you need only whole rye flour, which is rich in sourdough yeasts and bacteria, bread flour, water, time, and persistence (lots of the last two).  Amounts are small because I like to use the minimum of flour practical for building the sourdough, as so much of it will be thrown away.  If you are baking bread in the meantime, you can add any of these discards to a yeasted dough for extra flavor. 

WEEK ONE: 

SUNDAY EVENING:  Mix 1/3 cup (50 grams/1.8 ounces) whole rye flour with 1/4 cup (50 grams/1.8 ounces) water to make a thick paste and scrape it into a clean sealed jar.

TUESDAY MORNING:  The starter should have puffed a bit and smell sharp.  Add 1/3 cup (50 grams/1.8 ounces) bread flour and 1/4 cup (50 grams/1.8 ounces) water to the jar, stir it well, and scrape the sides with a rubber spatula to clean them.  Reseal the jar. 

WEDNESDAY MORNING:  The starter should have risen quickly.  It is now time to convert it into a stiff starter.  In a small bowl, dissolve a scant 2 tablespoons (30 grams/1.1 ounces) starter (discard the rest) in 2 tablespoons (30 grams/1.1 ounces) water, then add 1/3 cup (50 grams/1.8 ounces) bread flour and knead this soft dough.  Place it in a clean jar or lidded container, seal it, and let it ferment.

THURSDAY EVENING:  The starter will not have risen at all; it will have only become very gooey.  Repeat the above refreshment, throwing away any extra starter.

WEEK TWO: 

SATURDAY EVENING:  The starter will not have risen at all; it will have only become very gooey.  Repeat the same refreshment.

MONDAY MORNING:  The starter will finally be showing signs of rising, if only slightly!  Repeat the refreshment.

TUESDAY MORNING:  The starter should be clearly on its way and have tripled in twenty-four hours.  Repeat the refreshment.

WEDNESDAY MORNING:  The starter should be getting stronger and more fragrant and have tripled in twenty-four hours.  Repeat the refreshment. 

WEDNESDAY EVENING:  The starter should have tripled in eight hours.  It will be just about ready to use.  Reduce the starter in the refreshment to 1 tablespoon (15 grams/0.5 ounce) starter using the same amounts of water and bead flour as before.

THURSDAY MORNING:  The starter is ready for its final refreshment.  Use 1 1/2 teaspoons (10 grams/0.4 ounce) starter, 2 tablespoons (30 grams/1.1 ounces) water, and 1/3 cup (50 grams/1.8 ounces) bread flour.THURSDAY EVENING:  The starter is now ready to use in a recipe or to be refreshed once more and then immediately stored in the refrigerator.


Refreshment for a complete Sourdough Starter 

MAKES:  About a rounded 1/3 cup (90 grams/3.3 ounces) starter, enough to leaven about 3 1/3 cups (450 grams/16 ounces) flour in the final dough 

This stiff starter needs to be refreshed only every twelve hours.  Use this formula to refresh a refrigerated starter after if has fully fermented and started to deflate.  If the following starter does not quadruple in volume in eight hours or less, refresh it again, with these proportions, until it does.  If your kitchen is very cold, you will need to find a warmer area to ferment your starter.

1 1/2 teaspoons (10 grams/0.4 ounce) fully fermented sourdough starter

2 tablespoons (30 grams/1.1 ounces) water

1/3 cup (50 grams/1.8 ounces) bread flour 

MIXING THE STARTER:  In a small bowl, dissolve the starter in the water, then stir in the flour.  Knead this stiff dough until smooth.  You may want to adjust the consistency of the starter:  For a milder, faster-fermenting starter, make the starter softer with a little more water; for a sharper, slower-fermenting starter, make the starter extra stiff with a bit more flour.  Place it in a sealed container to ferment for 8 to 12 hours, or until it has fully risen and deflates when touched.


Conversion of a Batter-Type Starter into a Stiff Starter 

MAKES:  About a rounded 1/3 cup (90 grams/3.2 ounces) starter, enough to leaven about 3 1/3 cups (450 gram/16 ounces) flour in the final dough

If you already have a batter-type starter – that is, a starter with a pancake-batter consistency – you will need to convert it into a stiff starter for the Glezer recipes, or to check its strength.

1 tablespoon (15 grams/0.5 ounce) very active, bubbly batter-type starter

1 tablespoon (15 grams/0.5 ounce) water

1/3 cup (50 grams/1.8 ounces) bread flour 

MIXING THE STARTER:  In a small bowl, mix the starter with the water, then stir in the flour.  Mix this little dough until smooth, adjusting its consistency as necessary with small amounts of flour or water to make a stiff but easily kneaded starter.  Let it ferment in a sealed container for 8 to 12 hours, or until it is fully risen and starting to deflate.  If the starter has not quadrupled in volume in 8 hours or less, continue to refresh it with the proportions in “Refreshment for a Completed Sourdough Starter” until it does.


Well, maybe not a better banana bread, but different banana bread: cakier, creamier, moister. I, personally, think I prefer this loaf to the previous banana bread recipe I posted, but my wife makes the point that this recipe produces a much more delicate bread than the previous one does. For a quiet cup of tea on a lazy summer afternoon, this is the one. For a picnic at the zoo with a rambunctious three year old, the previous one is the way to go: it'll survive the transport in the car and backpack much better.

Recipe below.

This is, in fact, the same recipe as before with a cup of vanilla yogurt added. The yogurt made the dough moister, so in response I needed to add more flour. Since I was adding more flour, I decided to try using some whole wheat flour. It turned out well.

So if there is a lesson to be learned here, it isn't that this is the greatest banana bread in the world. It is to make each recipe your own. Bake often and do not be afraid to experiment. If you don't screw up a recipe from time-to-time you probably aren't baking enough!

Better Banana Bread
Makes 1 huge loaf or 3 small loaves

Preheat the oven to 350.

In one bowl, combine:

1/2 stick (4-5 tablespoons) butter, softened
2 eggs
2 or 3 very ripe bananas
1 cup vanilla or plain yogurt
2/3 cup sugar

Use a potato masher, fork, or spoon to squish the banana and mix the ingredients together. It is alright for there to be small (1 centimeter) chunks of banana in the batter, but you want most of the banana to be reduced to mush.

In another bowl, combine:

1 1/2 cup all-purpose unbleached flour
1/2 cup whole wheat flour
3/4 teaspoon salt
1/2 teaspoon baking soda
1/4 teaspoon baking powder
1/2 teaspoon cinnamon (optional)

Combine the wet and dry ingredients and mix until the ingredients are blended together.

If you like, stir in additional ingredients here, such as chopped walnuts or pecans, dried cherries or apricots, or chocolate chips. A handful (about a half a cup) is about right.

Pour the dough into greased baking pans and bake until a toothpick inserted in the center comes out clean. Small loaves take around 30 minutes, a normal-sized loaf takes around 50 minutes.

Remove from the oven. This bread is great warm, but it is excellent cold too.

After they have cooled for 5 or 10 minutes the loaves can be removed from the pan to cool. Once they are cool they can be individually wrapped and frozen.

Enjoy!

Related Recipe: 10 Minute Banana Bread.

Better Banana Bread

Danni3ll3's picture
Danni3ll3

Caramelized Onion Sourdough with Parmigiano-Reggiano and Italian Herbs

I have had a number of breads that include onions bookmarked, but never got around to trying them. So this is my attempt at this.

1. Caramelize 3 diced onions in 1 tbsp each of butter and olive oil. Since I quadruple my recipes, this took me 3 hours! Normally, it takes 45 minutes to an hour. Set aside to cool. I prepared mine a few days ahead and put them in the fridge. I let them come back to room temperature before using them.

2. Autolyse 650 g unbleached flour, 50 g freshly milled buckwheat flour, 252 g freshly milled red fife flour, 50 g freshly ground flax seed, 1 tbsp and 1 tsp of dried Italian herbs (the plan was to use 2 tbsp but I didn't have enough), 50 g freshly grated parmigiano-reggiano cheese and 700 g of water. I found putting in 600 g of water first, mixing and then adding the last 100 g to work really well in mixing the initial dough. Due to other things interfering, I let the dough autolyse for about 3 and half hours. Wow! I was very surprised at how supple the dough felt after this. I will have to not be afraid of autolysing for longer than a couple of hours.

3. Mix in 30 g plain full fat yogurt, 72 g of caramelized onions (or all that you got from step #1), 20 g salt and 275 g of 80% freshly fed levain. My levain is usually rye and unbleached flour but I have a bag of whole grain Rogers Whole Wheat flour that I need to use up so I am feeding my levain that instead of the rye. I find things are a bit slower but that is okay. I use my levain once it has tripled.

4. Do 3 sets of folds 20-30 minutes apart and leave to double. This took 5.5 to 6 hours. The wholewheat instead of the rye does slow things down. Or it just might be because it is much colder here... who knows. The dough will be ready when it is ready.

5. Divide into 729 g boules, pre-shape, let rest 15 minutes and do a tight final shape. I then put them in bannetons, covered them and then put into the fridge to proof for ~10 hours.

6. The next morning bake as usual in Dutch ovens for 25 minutes at 450F, uncover and then at 425F for 22 minutes. 

They smell fabulous! Unfortunately, they are all promised to other people, I even had to give away the loaf that I was saving for us so no crumb shot unless one of my friends sends one to me. 


Isand66's picture
Isand66

Hamburger Onion Parmesan Buns

We bought some chicken Buffalo style sliders the other day so I wanted to make some tasty buns to go with them.  The buns needed to be hearty enough to hold the burgers and the fixings as well as soft enough like a hamburger bun needs to be.

I adapted a recipe from KAF and made several changes including the flour types and changes and additions in several ingredients.  I added some dried onions and some Parmesan powder to give it a little extra flavor and just enough honey to round out the flavor profile.

These would have been perfect had I not left them in the oven a few minutes too long since I was working at the same time I was baking these.  One of the benefits of working from home but also one of the possible pitfalls.  In any case these tasted great and made perfect burger buns and sandwich rolls as well.  If you try these you will not be disappointed, of that I can guarantee you.

The European style flour I used has a small percentage of white whole wheat flour and malt which along with the Spelt flour and Durum flour really gave these rolls some excellent flavor.

Hamburger-Onion-Rolls

Directions

Bring the milk up to a boil in a heavy-duty sauce pan and let it simmer for a couple of minutes.  Take it off the heat and let it cool to room temperature before using.

In the mean time leave your butter out at room temperature or soften in your microwave.

Mix flours with yeast to combine.  Next add remainder of the ingredients and mix on low for 1 minute and then for 9 minutes at speed number 2 and 1 minute at speed number 3.  You want to mix/knead until you develop a nice thin window pane which will ensure that the rolls end up nice and soft.

Take the dough out of your mixer and form it into a ball and place in a well oiled bowl or dough rising bucket.  Make sure to cover the dough and let it rise at room temperature of if you have a proofer set it to 82 degrees and let it rise until doubled.  It took me about 1 hour to double in my proofer.

Next gently deflate the dough and form into rolls and place on cookie sheet with parchment paper.  Cover with a moist towel or plastic wrap sprayed with cooking spray.  Let it sit at room temperature for about 1 hour until the rolls have almost doubled in size and pass the poke test.

NoSeedsRisen

Around 30 minutes before ready to bake the rolls, pre-heat your oven to 450 degrees and prepare your oven for steam as well.  I use a heavy-duty pan in the bottom shelf of my oven and pour 1 cup of boiling water in right before placing the rolls in the oven.

Right before you are ready to bake the rolls prepare an egg wash, paint your rolls and add  your topping of choice.

Seeded-Risen-Rolls

Seededclosup

Bake the rolls at 450 degrees for the first 5 minutes and lower the oven to 425 degrees until they are nice and brown.  Just make sure that they don't turn into charcoal like mine almost did :).

These should take about 25 minutes to cook thoroughly.  When done  let them cool on wire rack for at least half an hour before digging in if you can wait that long.

Crumb

IMG_0130
Cleopatra didn't mind the "dark" rolls at all....
txfarmer's picture
txfarmer

SD 100% WW Hokkaido Milk Loaf - an oxymoron?

Recently, I have posted about my SD version of the classic Hokkaido Milk Loaf (see here: http://www.thefreshloaf.com/node/23662/sourdough-hokkaido-milk-loaf-classic-shreddable-soft-bread), this time I adapted it to use all ww flour. Yes, the original Hokkaido Milk Loaf is quite enriched, and this ww version is not any "leaner", however, I do think ww flour adds more dimension to the flavor, and all the enriching ingredients bring incredible softness to this 100% ww loaf. To me, "healthy eating" is not about restricting, on the contrary, it's about bringing in different kinds of natural food groups into my diet and thriving for a balance.


SD 100%ww Hokkaido Milk Loaf

Note: 19% of the flour is in levain

Note: total flour is 420g, fit my Chinese small-ish pullman pan. For 8X4 US loaf tin, I suggest to use about 450g of total flour.


- levain

starter (100%), 22g

milk, 37g

ww flour (I used KAF ww), 69g

1. Mix and let fermentation at room temp (73F) for 12 hours.

- final dough

ww flour, 340g

sugar, 55g

butter, 17g, softened

milk powder, 25g

egg whites, 63g

salt, 6g

milk, 150g

heavy cream, 118g


1. Mix together everything but butter, autolyse for 40-60min. Add butter, Knead until the dough is very developed. This intensive kneading is the key to a soft crumb, and proper volume. The windowpane will be thin and speckled with grains, but NOT as strong as one would get form a white flour dough. For more info on intensive kneading, see here.

2. rise at room temp for 2 hours, punch down, put in fridge overnight.

3. Take out dough, punch down, divide and rest for one hour.

4. Shape into sandwich loaves, the goal here is to get rid of all air bubles in the dough, and shape them very tightly and uniformly, this way the crumb of final breads would be even and velvety, with no unsightly holes. For different ways to shape (rolling once or twice, i.e. 3 piecing etc) see here.

5. Proof until the dough reaches one inch higher than the tin (for 8X4 inch tin), or 80% full (for pullman pan). About 5 hours at 74F.

6. Bake at 375F for 40-45min. Brush with butter when it's warm.


A crumb and flavor even whole grain haters would love.


Tear/shread away...


Sending this to Yeastspotting.

ananda's picture
ananda

Laminated Yeasted Dough Construction

Hi,

I thought some detail on creating laminated dough for croissants etc may be a popular subject.


CROISSANT DOUGH


MATERIAL

FORMULA

[AS % OF FLOUR]

RECIPE

[GRAMMES]

RECIPE [GRAMMES]

Strong White Flour

100

600

1000

Salt

1.3

8

13

Milk Powder

5

30

50

Fresh Yeast

6

36

60

Cold Water

63

378

630

SUB-TOTAL

175.3

1052

1753

Butter

41.7

250

417

TOTAL

217

1302

2170

Method:

  • Mix the ingredients for the dough to form cool, developed dough.
  • Put in a plastic bag in the chiller and rest for 30 minutes. Cut the butter into 4mm thick strips and put back in the chiller.
  • Roll the dough out to a rectangle 8mm thick. Put the butter pieces flat onto 2/3 of the rectangle, and fold as below:


  • Turn the dough piece clockwise through 90°. Roll out to the same size as before, fold as above, and turn. Repeat once more.
  • Chill the billet for half an hour and give 2 more folds and half turns as described. This gives 168 layers of butter in the croissant dough. Chill again for half an hour.
  • Roll the dough piece out to 5mm and use a croissant cutter to cut out triangle shapes. Stack into piles of 6 and rest covered for 2-3 minutes.   You can use a template made from wood, or, cardboard, to cut out the individual triangle shapes instead.   Please see the video, at 1 min 35secs, for a brief view of the croissant cutter on the left of the screen.
  • Tease out each triangle, fold up the top edge and roll up tightly. Roll out the feet to pointed ends and move round so these feet join up to make the classic shape.   See Vicki demonstrating this in the pictuure below.   For Pain au Chocolat and Pain Amande, cut the dough into strips, 6 x 10 cm; cover with small chocolate chips, or a thin layer of almond paste, and roll up so the seam is well pressed down on the bottom.
  • Place on silicone lined baking sheets and brush with beaten egg.   For the pain amande, dip in flaked almonds
  • Prove at 38-40°C, 80%rH for 40 minutes.

Bake in a hot oven, 235°C for 12-15 minutes; a deck oven should be set at 7 for top heat, and 5 for bottom.   No steam is used, and a damper is not needed.

[Almond Paste to make Pain Amande]

150g Icing Sugar, 150g Caster Sugar, 300g Ground Almonds, 50g Egg, beaten, 1 tbsp Lemon Juice


Key Principles of successful laminated dough:

  • 1. The dough should not be too wet. If the dough is soft, it will stick to the bench and the pin, and the laminations will quickly be ruined. If the dough is too tight, it will be difficult to roll out without the dough insisting on springing back. Some have advised that the dough need not, therefore, be fully-mixed. This is because all the rolling and folding will continue the dough development. My own thought on the matter is that the dough should be developed to the level allowed by the choice of flour used. So if a top grade flour is used, the dough should be mixed accordingly. If the flour is not so strong, it will not tolerate intensive mixing anyway; by hand, or, machine.
  • 2. The best way to deal with dough which springs back is to allow extra resting time. Allowing plenty rest between turns is the first key principle to grasp. If you compare the folding process to working out bicep muscles in the gym, you should not go far wrong. Bicep curls would be repeated to the point where the muscle is so tensed up it cannot do any more. After a period of rest the same moves are repeated. The moves are designed to strengthen the muscle by continued work. But there has to be rest in between to allow the muscles to relax. It is exactly the same for the gluten-based protein fraction in the dough.
  • 3. The other key principle is to be able to work cold. It is generally cold and raining here in the UK, but I am aware many who write on this site have problems creating cool enough conditions in the kitchen to lessen the burden of making these items; I wish I lived where it was warm too, don't you believe it! Here are a few options:
  • Use a chilled marble slab, or, a refrigerated work surface.
  • Use crushed ice in the dough, or chill the dough water for an extended period prior to dough mixing.
  • A good trick is to chill the dough overnight. Give the dough 3 half turns, then bag and chill overnight. Waken up early the next morning, give the dough its last half turn and process from there. Bake off the croissants and serve straightaway for breakfast. You have just made yourself soooo popular with everyone in the house, forever!
  • 4. What about the choice of laminating fat? Commercial croissants tend to be made with specialised and plasticised fats. This means the final product tends to be just a lot of air! Worse still if the fat is cheap, the melting point will be high, and the product will stick in the roof of the mouth [palate cling] These fats are not exactly renowned for their health-giving properties, either. So they are used on cost and performance grounds. As far as I am concerned croissants are made with all-butter. It is possible to buy a concentrated butter commercially. This is great, because all the water has been removed, so it means the butter block can be rolled out to a sheet, without it melting. Household dairy butter has a water content of 15-20%, so the problem with not working cold, is that the butter can easily start to melt, meaning the death of all the laminations you have worked so hard to achieve. So, performance-wise, butter is not the best, but for flavour, it obviously has no competition. I'm pretty sure concentrated butter is only available commercially; this is definitely the case for the UK and rest of the EU too.
  • 5. Regarding lamination; due care and skill is the 3rd principle. I teach that croissant are given 4 half turns. Danish are often given only 3. Full puff paste employs equal laminating fat to flour used in the dough. This is usually given 6 half turns. The more turns, the more layers created. Above I state 4 turns gives 168 layers. Another 2 half turns works out as follows

168 x 3 = 504   504 x 3 = 1512.   So many layers is incredibly difficult to achieve.   Yet, to commercial bakers it is essential.   The number of layers dictates the amount of "lift" in the product, giving greater volume to weight ratio!   This affects product yield; well-aerated puff paste yield more products.   Given these doughs use expensive ingredients, a baker cannot afford to miss out on achieving correct product yield.

  • 6. In terms of volume and lift, it is important to explain how this works with yeasted doughs like these. When the product goes into the oven, the fat layers melt into the dough layers beneath, creating cavities between the dough layers. These cavities are filled with steam from the water content of both butter and dough. The steam exerts pressure on the dough layer above, causing the product to expand. See diagram below. So, it follows that the more layers, the greater the pastry will rise. So, what of the yeast? Well, the benefit is in terms of a first fermentation for sure, but it has to be achieved in cold conditions, as we have noted. This should mean the yeasts are far from worked through when the croissants are set to prove. Note the yeast level is relatively high. Any benefit has to be derived from rapid expansion as the croissants hit the hot oven. So, testing the dough for evidence that fermentation is slowing down is not a relevant test. We have no need for any sort of complex fermentation at this stage.

7. Lastly, oven treatment tends to be incredibly forgiving to croissants , so long as the oven is hot enough. Although, I think I'd be hedging my bets with items that were becoming tired and spent, in line with the notes just above.   My practical classes last anywhere between 3 and 5 hours.   3 hours is really not very long to make these items with skill from start to finish; and the resting between turns really can be so crucial here.   But I cannot think of a single class I have facilitated on this product where the students have been anything other than delighted by the tasks they have carried out, and the products they have made. It's the colour, and aroma; these items just look and smell great when they are baked. Fabulous!

 See the photos attached below, and the link to the video below that.


Here's the video:

Janedo's picture
Janedo

The Great Baguette quest N°3: Anis Bouabsa

Tuesday morning, we decided to go visit the Duc de la Chapelle, Anis Bouabsa's bakery in Paris. As you probably know, he won this year's Best Baguette. The bakery is situated in a modest neighborhood, far from the typical tourist traps and chic areas. We entered the bakery and asked he woman behind the counter several questions before buying a selection of breads. She was very nice and helpful. As we left the bakery, we took some pictures of the young baker/apprenti who was scoring baguettes and sliding them in to the oven. Disappointed by the quality of the photos through the window, Florence returned and asked if we could go inside and take just a few pictures. The woman showed her the way, no questions asked!

Once inside, who came through, but Anis himself! I felt like a teenager who was getting a real-live view of her movie star hero. He looked at me through the window and asked Flo who I was. I think he thought I was a bit idiotic because I had such a huge grin on my face! He opened the door and told me to come on in.

So, here you have two passionate home bakers in front of a master, and may I say the sweetest, nicest and most generous master. We started asking him questions and he told us EVERYTHING! He explained from A to Z how he makes his famous baguette. He adapted the recipe for home use for us and explained how we could do the steps at home. He showed us how to form the baguettes, slide them in the oven, what temperature.... EVERYTHING!

We even asked him if we could come and have a real lesson and he didn't say no, he said in September it could be possible.

Now, what he told us was actually quite surprising! The baguette dough has a 75% hydration, very little yeast, hardly kneaded, folded three times in one hour then placed in the fridge 21hrs. They are not fully risen when placed in the oven, it is the wet dough and the very very hot oven (250°C) that make give the volume. 

When I get some time, I will be trying his recipe. I feel success is near!!!!

Anis gave me permission to publish his pictures. They were all taken by Florence, "photographe extraordinaire".

Jane  

Anis Bouabsa

 ExplanationsExplanations

Baguettes à cuireBaguettes à cuire

OvenOven

BaguettesBaguettes


zolablue's picture
zolablue

Sourdough Challah (photos & recipe)

I baked my first challah last Thursday and wanted to share.

I was unsure what to expect but it was so much fun. I’d been meaning for some time to bake a recipe from Maggie Glezer’s book, A Blessing of Bread, which is a wonderful compilation of traditional Jewish recipes from around the world. Floyd has written a very nice review of the book here.

http://www.thefreshloaf.com/bookreviews/ablessingofbread

I decided to start with Glezer’s own personal recipe for sourdough challah. I love making sourdough and was interested to see what the texture of this bread would be compared to a yeasted challah which I have eaten only a couple times.

The recipe seemed easy to me despite the fact Glezer calls it expert. I’m not sure why but, again, I’m new to challah. The dough was so easy to mix together and then, as Glezer puts it, the time involved is mostly waiting after that.

She says to bake it to a dark brown which I did. I’m not sure if it is considered too dark or not but it was really a beautiful color and I do typically bake my bread darker as she instructs in Artisan Baking.

The crumb was amazing to me. It was very creamy and soft and almost reminded me of an angel food cake. It has remained moist to this day (5 days later) as there are only two of us to eat and can’t quite get rid of all the bread I bake. I am going to cut very thick slices of what is remaining to freeze and later use to make French toast.

I decided for my maiden voyage into challah bread I would make an elaborate braid. I used the six-strand braid version and got a lot of help from the video Glezer did showing how to do it. Gosh, the internet is awesome! Just as she said it makes a beautiful, very high loaf.

Braiding ChallahFine Cooking Video, Maggie Glezer

http://www.taunton.com/finecooking/videos/braiding-challah.aspx?

I’m posting the recipe so those of you who are new to challah as I am can have a chance to make it and perhaps will be inspired to buy this lovely book. For those who have made challah for years I’d love it if you tried the recipe and let me know your thoughts on it compared the some of your favorite traditional recipes.

More of my photos can be seen here:

http://zolablue.smugmug.com/gallery/3500289#197395950

Thank you to each and every one of you on this site that have been such inspirations in baking such as Floyd, Bill Wraith, Susanfnp, Mountaindog, JMonkey, Browndog, Bluezebra, Eric, SDBaker, Mini Oven, Dolf, Qahtan, Zainab and so many others. All you wonderful bakers have helped me incredibly along the way over the past few months that I have been baking so many thanks to all.

My Sourdough Challah - Maggie Glezer's personal recipe from her book, A Blessing of Bread

Sweet sourdough breads are delicious and well worth the time (which is mainly waiting time) if you are a sourdough baker. The sourdough adds a subtle tang to my challah, and the crumb has a moister, creamier texture that keeps even longer than the yeasted version. While it’s true that challah or, for that matter, all bread was at one time sourdough (the Hebrew word for leaven, chametz, means “sour”), challahs have definitely gotten sweeter and richer since the introduction of commercial yeast. To convert such recipes back to 100 percent sourdough, the sugar has to be cut back in order for the dough to rise in a reasonable length of time (sugar that is more than 12 percent of the flour weight inhibits fermentation), so this version will taste slightly less sweet than the yeasted one, a deficit completely overridden by the rich complexity of the sourdough. I have also changed the all-purpose flour to bread flour, which has more gluten, to counteract the starter’s propensity to loosen the gluten (the acids in the starter change the proteins, a natural part of sourdough baking).

Skill Level: Expert

Time: About 20 hours (about 8 1/2 hours on baking day)

Makes: Two 1-pound (450-gram) challahs, one 1 1/2-pound (680-gram) challah plus three rolls, or sixteen 2-ounce (60-gram) rolls

Recipe synopsis: Make the sourdough starter and let if ferment overnight for 12 hours. The next day, mix the dough and let it ferment for 2 hours. Shape the dough and let it proof for 5 hours. Bake the breads for 15 to 40 minutes, depending on their size.

For the starter:

2 tablespoons (35 grams/1.2 ounces) very active, fully fermented firm sourdough starter, refreshed 8 to 12 hours earlier

1/3 cup (80 grams/2.8 ounces) warm water

About 1 cup (135 grams/4.8 ounces) bread flour

For final dough:

1/4 cup (60 grams/2 ounces) warm water

3 large eggs, plus 1 for glazing

1 1/2 teaspoons (8 grams/0.3 ounce) table salt

1/4 cup (55 grams/1.9 ounces) vegetable oil

3 tablespoons (65 grams/2.3 ounces) mild honey or a scant 1/3 cup (60 grams/2.1 ounces) granulated sugar

About 3 cups (400 grams/14 ounces) bread flour

Fully fermented sourdough starter

Evening before baking - mixing the sourdough starter: Knead starter into water until it is partially dissolved, then stir in the flour. Knead this firm dough until it is smooth. Remove 1 cup (200grams/7 ounces) of the starter to use in the final dough and place it in a sealed container at least four times its volume. (Place the remaining starter in a sealed container and refrigerate to use in the next bake.) Let the starter ferment until it has tripled in volume and is just starting to deflate, 8 to 12 hours.

Baking day - Mixing the dough:

In a large bowl, beat together the water, the 3 eggs, salt, oil, and honey (measure the oil first, then use the same cup for measuring the honey — the oil will coat the cup and let the honey just slip right out) or sugar until the salt has dissolved and the mixture is fairly well combined. With your hands or a wooden spoon, mix in the bread flour all at once. When the mixture is a shaggy ball, scrape it out onto your work surface, add the starter, and knead until the dough is smooth, no more than 10 minutes. (Soak your mixing bowl in hot water now to clean and warm it for fermenting the dough.) This dough is very firm and should feel almost like modeling clay. If the dough is too firm to knead easily, add a tablespoon or two of water to it; if it seems too wet, add a few tablespoons flour.

The dough should feel smooth and very firm but be easy to knead.

Fermenting the dough:

Place the dough in the warm cleaned bowl and cover it with plastic wrap. Let the dough ferment for about 2 hours. It will probably not rise much, if at all.

Shaping and proofing the dough:

Line one or two large baking sheets, with parchment paper or oil them. Divide the dough into two 1-pound (450-gram) portions for loaves, one 1 1/2 pound (680-gram) portion for a large loaf and three small pieces for rolls (the easiest way to do this without a scale is to divide the dough into quarters and use one quarter for the rolls and the rest for the large loaf), or sixteen 2-ounce (60-gram) portions for rolls. Braid or shape them as desired, position them on the prepared sheet(s), and cover them well with plastic wrap. Let proof until tripled in size, about 5 hours.

Meanwhile, 30 minutes before baking, arrange the oven racks in the lower and upper third positions if using two baking sheets or arrange one rack in the upper third position if using one sheet, and remove any racks above them. Preheat the oven to 350°F (180°C/gas mark 4). If desired, preheat one or two baking sheets to double with the baking sheet(s) the loaves are on. Beat the remaining egg with a pinch of salt for glazing the breads.

Baking the loaves:

When the loaves have tripled and do not push back when gently pressed with your finger but remain indented, brush them with the egg glaze. Bake rolls for 15 to 20 minutes, the 1-pound (450-gram) loaves for 25 to 35 minutes, or the 1 1/2-pound (680-gram) loaf for 35 to 45 minutes, until very well browned. After the first 20 minutes of baking, switch the loaves from front to back so that they brown evenly; if the large loaf is browning too quickly, tent it with foil. When the loaves are done, remove them from the oven and let cool on a rack.

breadsong's picture
breadsong

Pumpkin Sourdough Rye - for BBD #62

Hello everyone,

It was lovely see all of the breads bakers around the world contributed for World Bread Day in October –
thank you to Zorra for her work to round all of these up!

                                                                               
BBD #62 - Bread Baking Day meets World Bread Day (last day of sumbission December 1st)

November’s Bread Baking Day (BBD #62) celebrates the breads contributed for World Bread Day,
inviting bakers to bake a World Bread Day bread for BBD #62.

One of the rye breads contributed for World Bread Day really caught my eye:  a Pumpkin Rye Sourdough bread, kindly posted by a Polish baker on the blog ‘The Scent of Bread – Zapach Chleba’.

Wasn't this an incredibly gorgeous rye? The beautiful, airy crumb and glorious color – I had to try making this one! This is my attempt at re-creating this amazing Polish baker’s bread.


I couldn’t find any information on the type 720 flour this baker used, so I used some whole, dark organic rye flour from Nunweiler’s.  This is a really, really nice flour to work with – I was very happy with the fermentation.
My rye levain was very happy, too – this picture was taken just before mixing the dough:


This bread has a fantastic flavor. I used squash and roasted it until it was really caramelized.
The sweetness from the squash is delicious in the baked bread!
                                                  (another picture of the crumb)


Here are the quantities I used for a 9x4x4 Pullman pan:


Thank you Zorra, for providing a venue for bakers around the world to share bread, and thank you to the baker from Zapach Chleba for baking this Pumpkin Sourdough Rye.


Happy baking, everyone, and Happy Thanksgiving to all those celebrating this week!
:^) breadsong

(submitted to YeastSpotting)


Flour.ish.en's picture
Flour.ish.en

Tartine Olive Walnut Bread

Breaking this bread is tantamount to opening a holiday present. At least, it feels that way when I cut the bread. The abundant good eats: olives, walnuts, sunflower seeds, herbs de Provence, lemon zest, filled the interior to the rim, are what make this bread sing. 

This Tartine olive walnut bread uses a young leaven (20% of flour weight) and 10% whole wheat flour. Nothing out of the ordinary. However, the big winner is with all the add-ins, especially the olives. Since the dough is quite wet, series of stretch-and-fold help to strengthen it. I sprinkled more sunflower seeds around the proofing basket to prevent the dough from sticking. The dough was retarded in the fridge overnight. I made a full recipe (see the cheat sheet below for details) and baked two large loaves in Dutch ovens (one round, one oval) in a preheated 500°F oven. Lower the oven temperature to 475°F as the loaves are loaded. Finally, bake for 15 minutes with the cover on and 20-25 minutes uncovered.

All the olives, nuts, seeds and herbs make for quite a substantial bread. The bread stands on its own with its fairly loud flavors. Like all good breads, serve up with some fine cheese and wine, nothing can be better!

Adapted from Tartine Bread by Chad Robertson

https://www.everopensauce.com/tartine-olive-walnut-bread/

Pages